


| jdhiker on We have doors and windows… | |
| Michael B Kopp on We have doors and windows… | |
| jdhiker on More camping | |
| Jeff on More camping | |
| jdhiker on We have doors and windows… |
So I have been working in the barn long nights lately… Often until midnight, just to be able to get the teardrop road worthy enough to make the annual trip to Eden Ny. For the past 12 years , our family has been traveling the 800 mile round trip to see friends who we now call family.
The event is a huge deal for us, it has grown in size through the years and we have brought so many different campers there. The 64 Shasta made the trip quite a few years, we brought a pop up a few years, tents and our brand new big white box the 26′ Summer-land last year is when I decided to build the teardrop, after sweating out yet another year of 8mpg and worries of the truck breaking down solidified the need for a more economical way to travel and camp there.
So in the barn working hard to get the teardrop ready enough to tow and camp in , but also nice enough to have my Wife Charlene happy to be in it too.
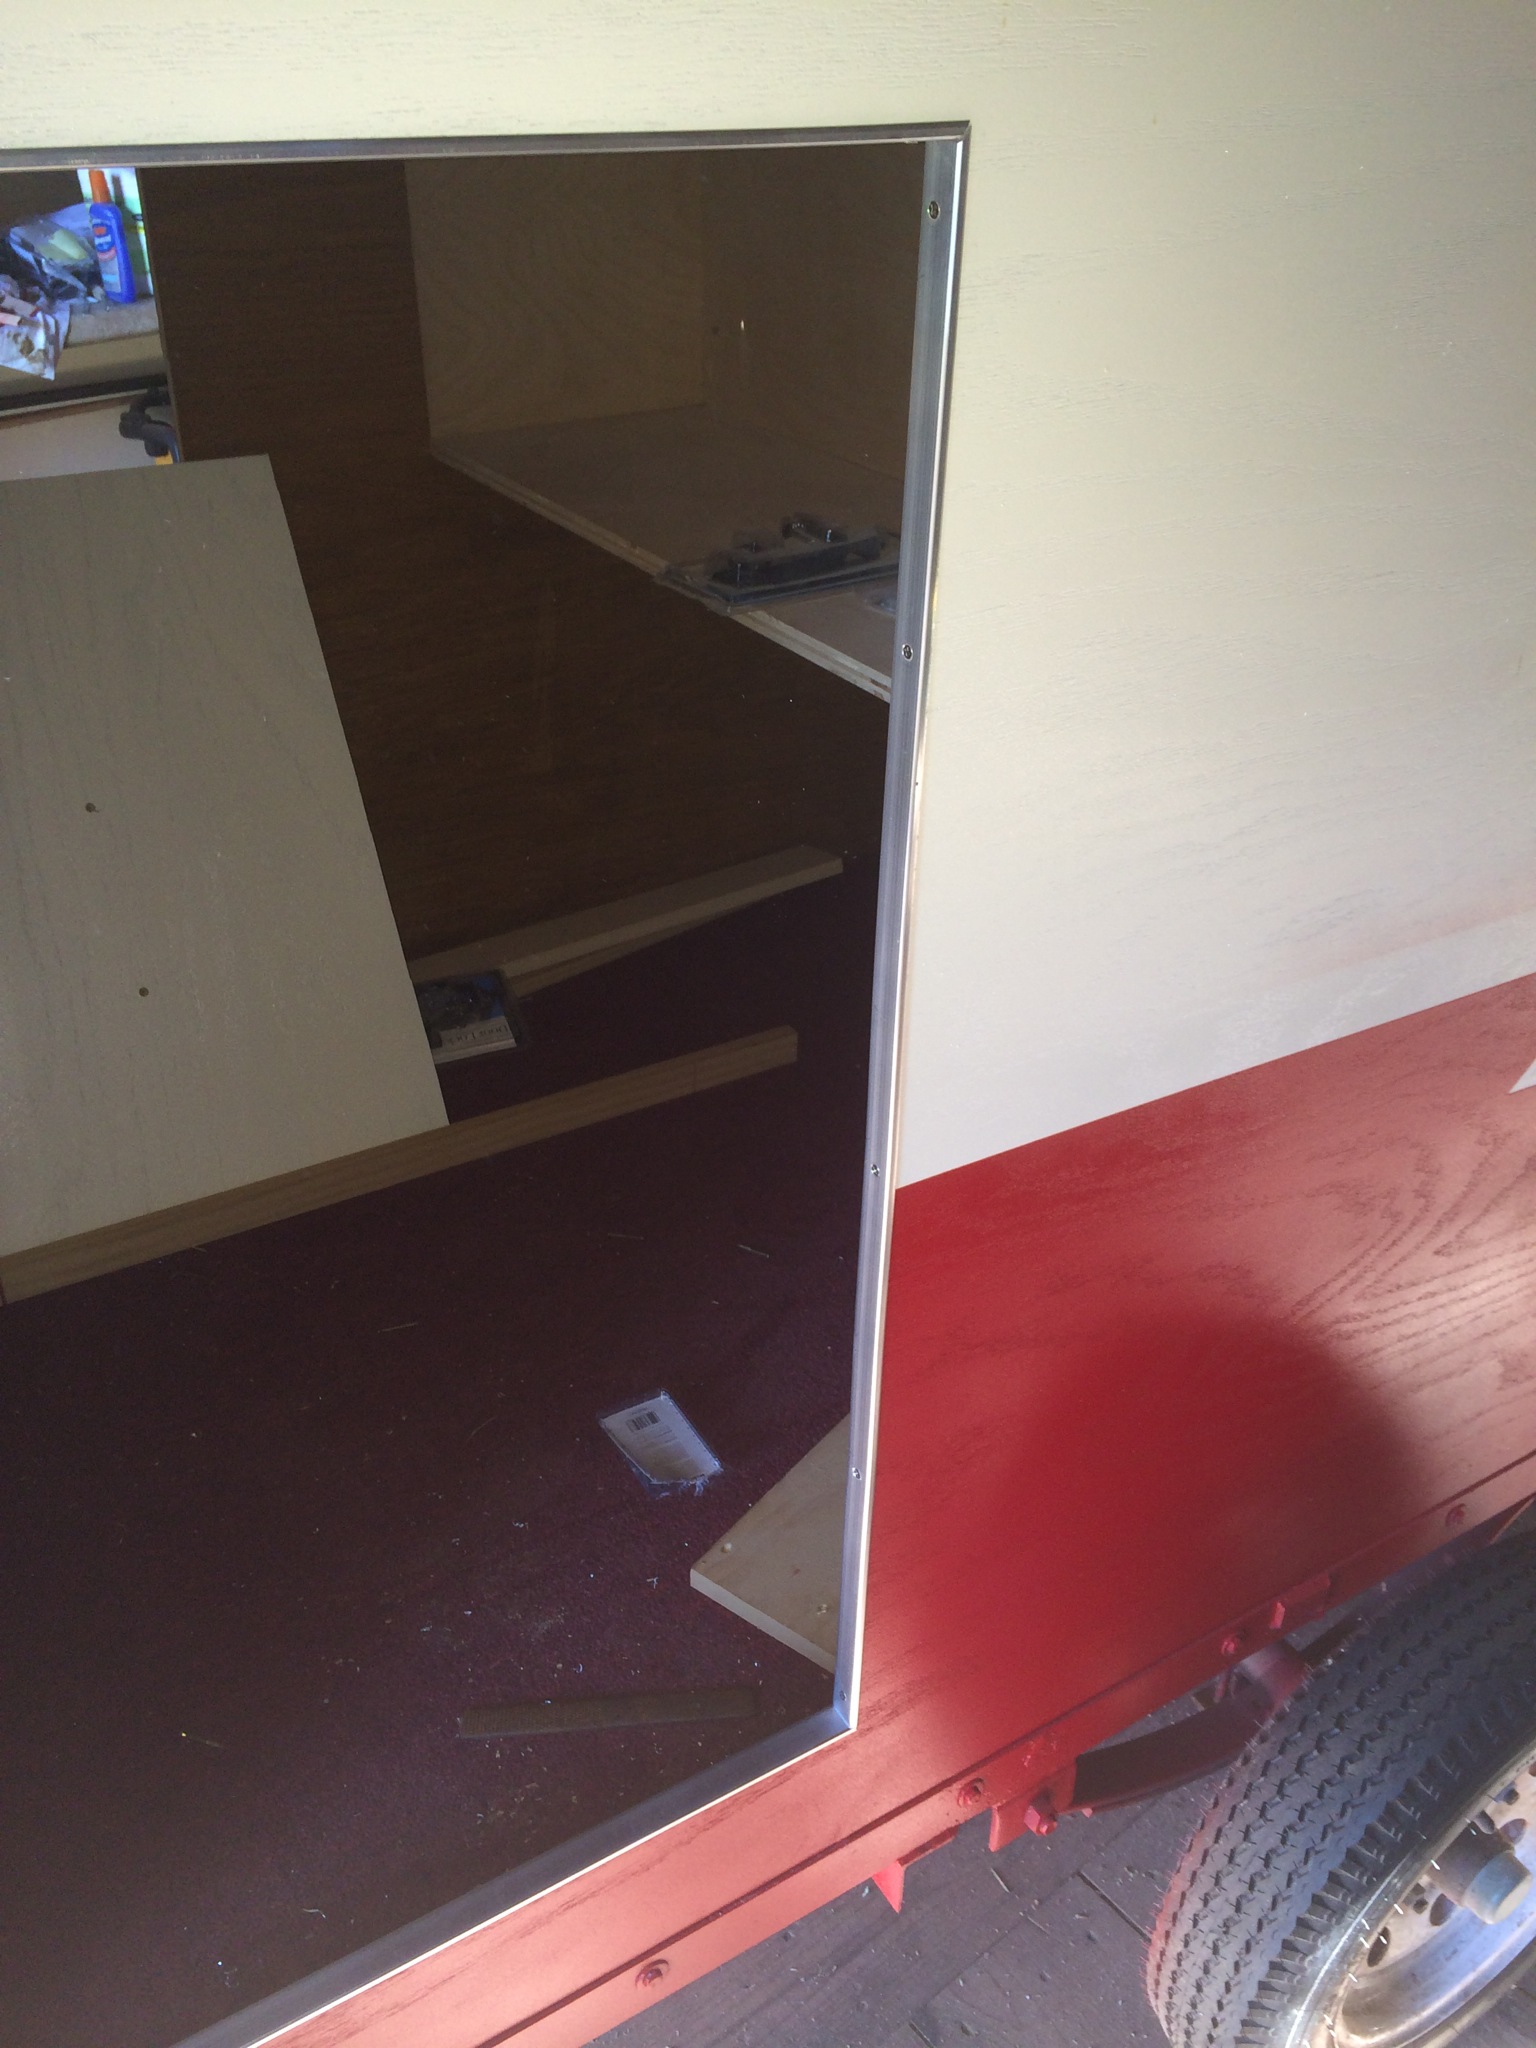
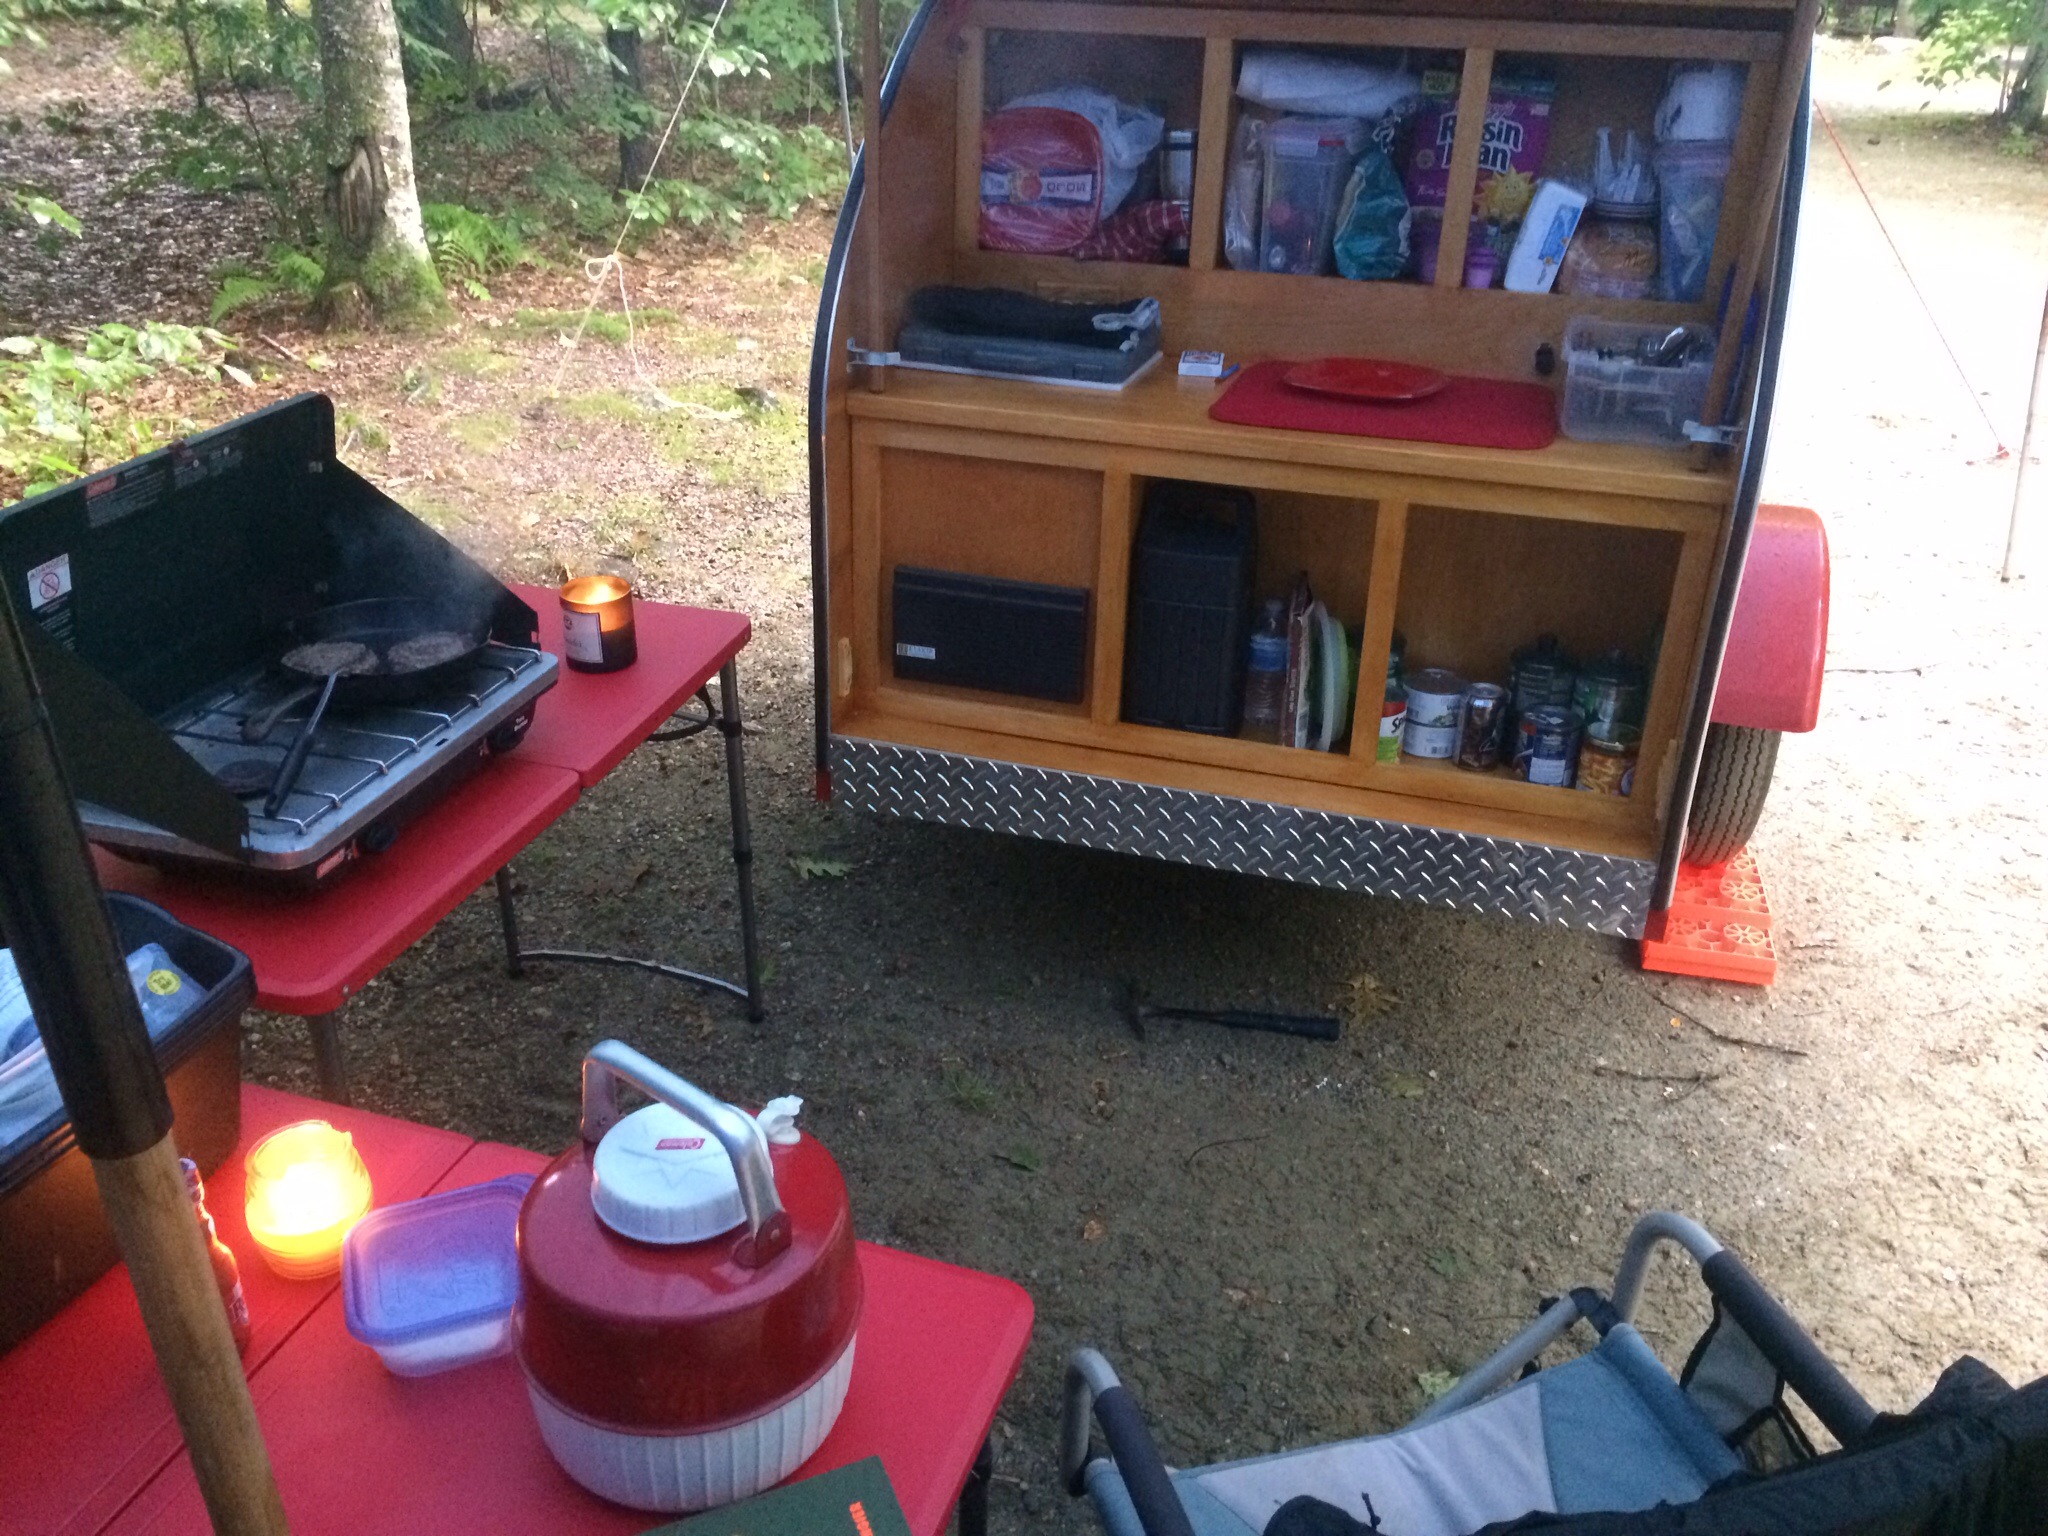
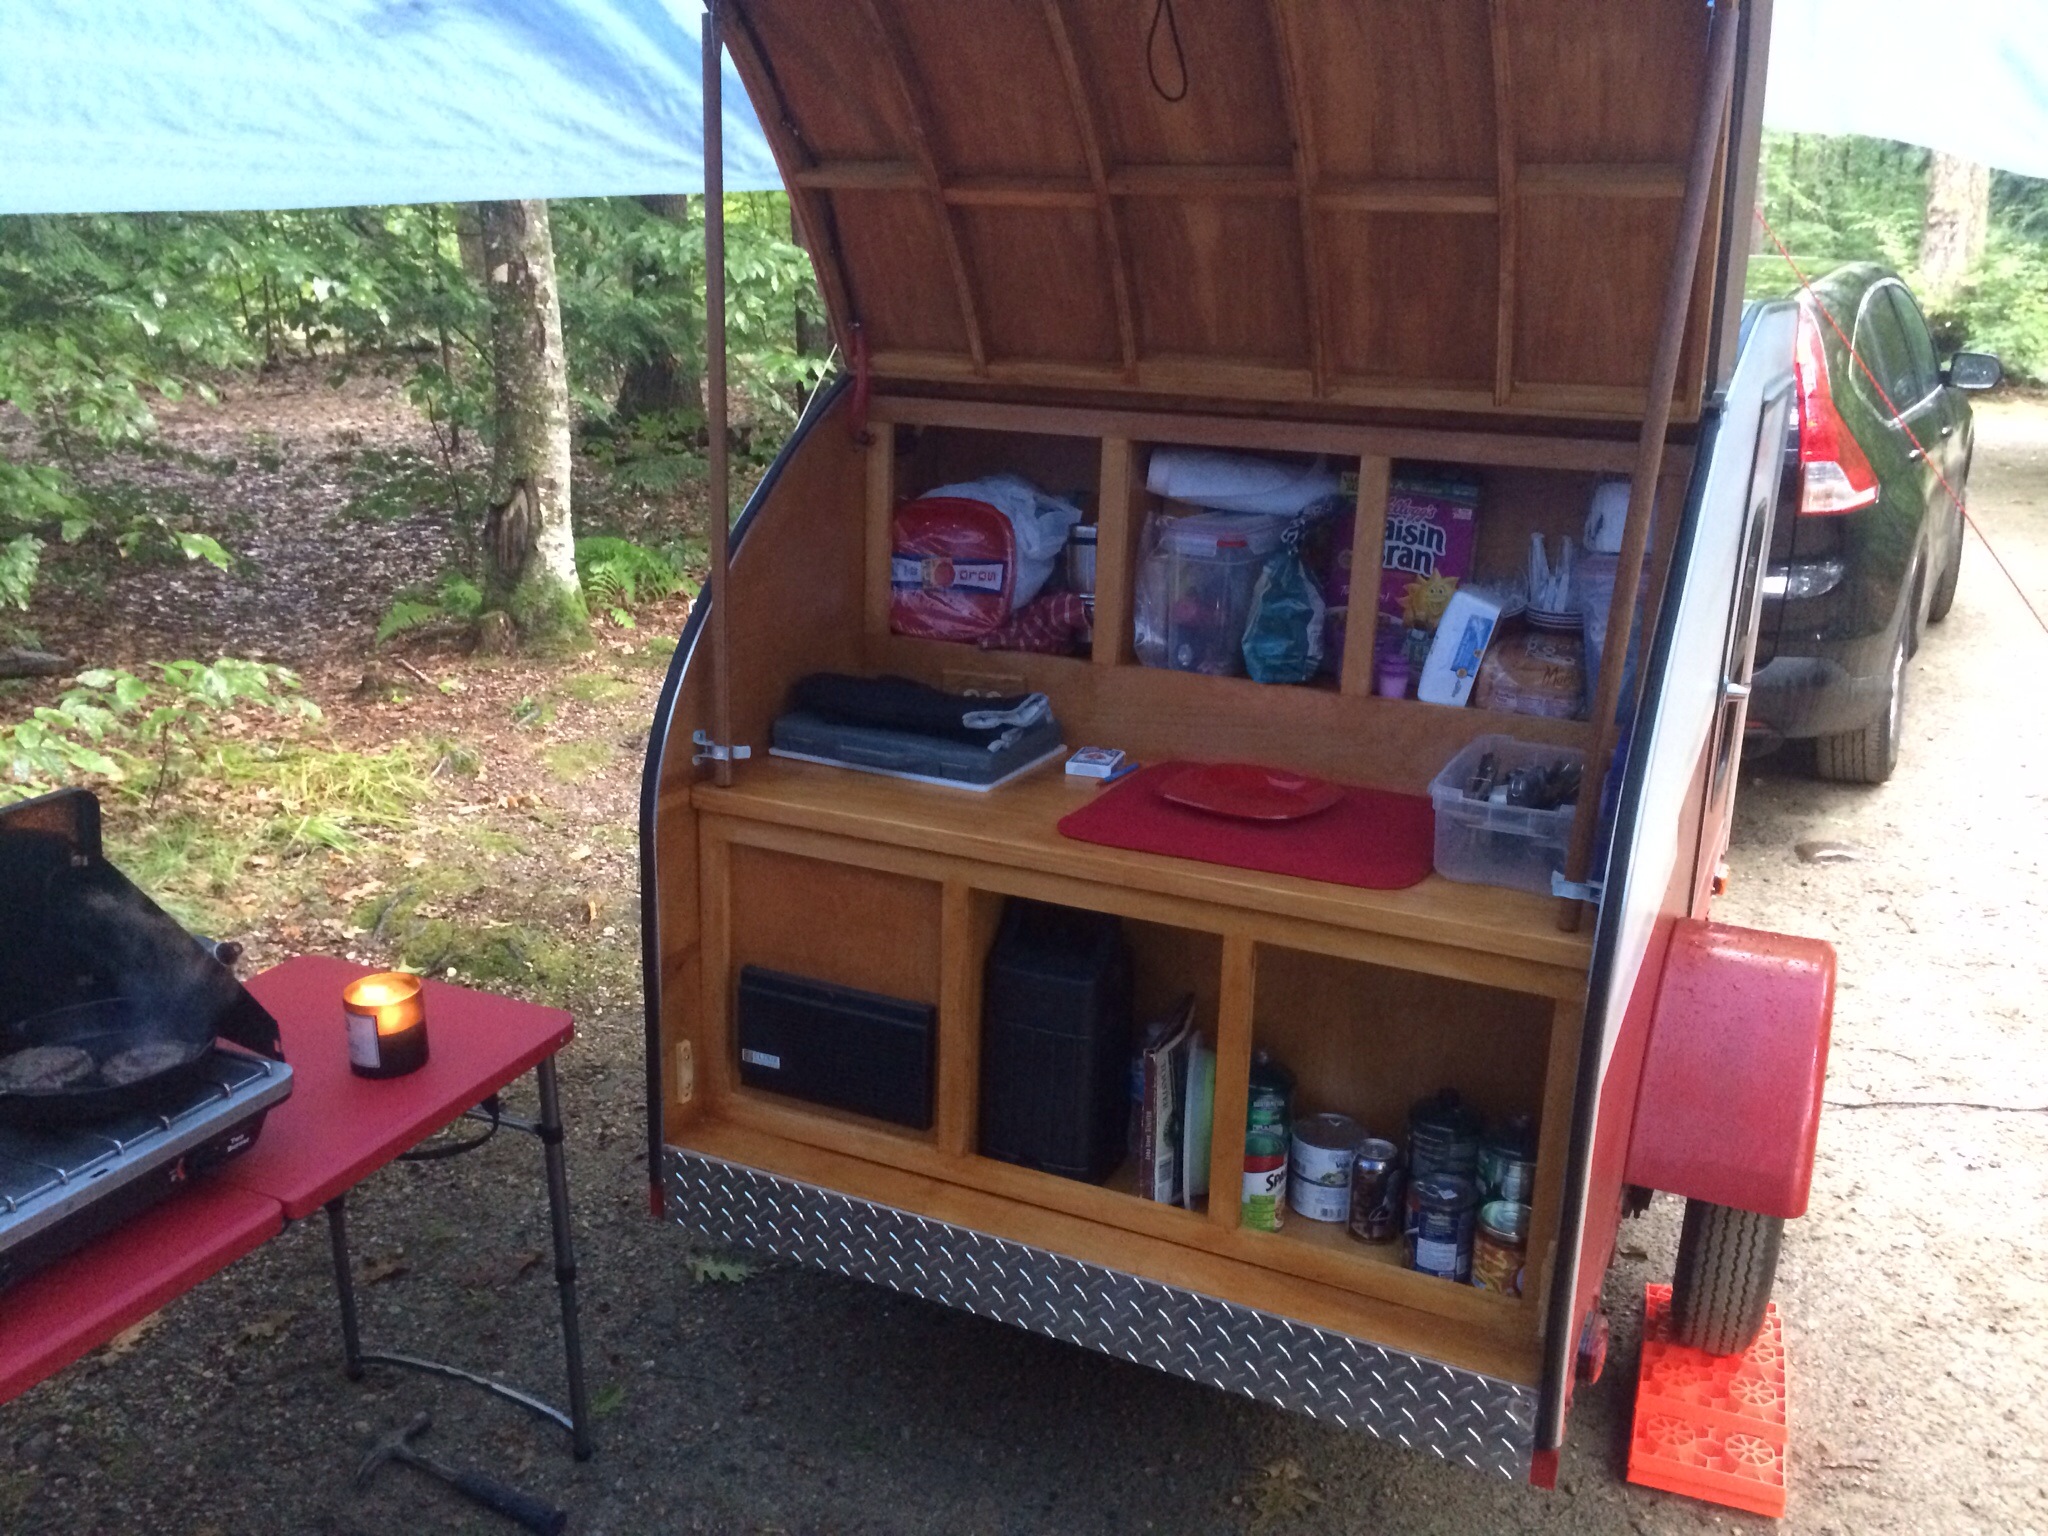
Well after lots of work I had it ready !! No cabinet doors yet in the Galley, Also the cabinet in the sleeping compartment not finished either but it’s ready to roll !!
I finished all the wiring to the fan and lights. Added the switches for that. Finished the power converter and mounted it

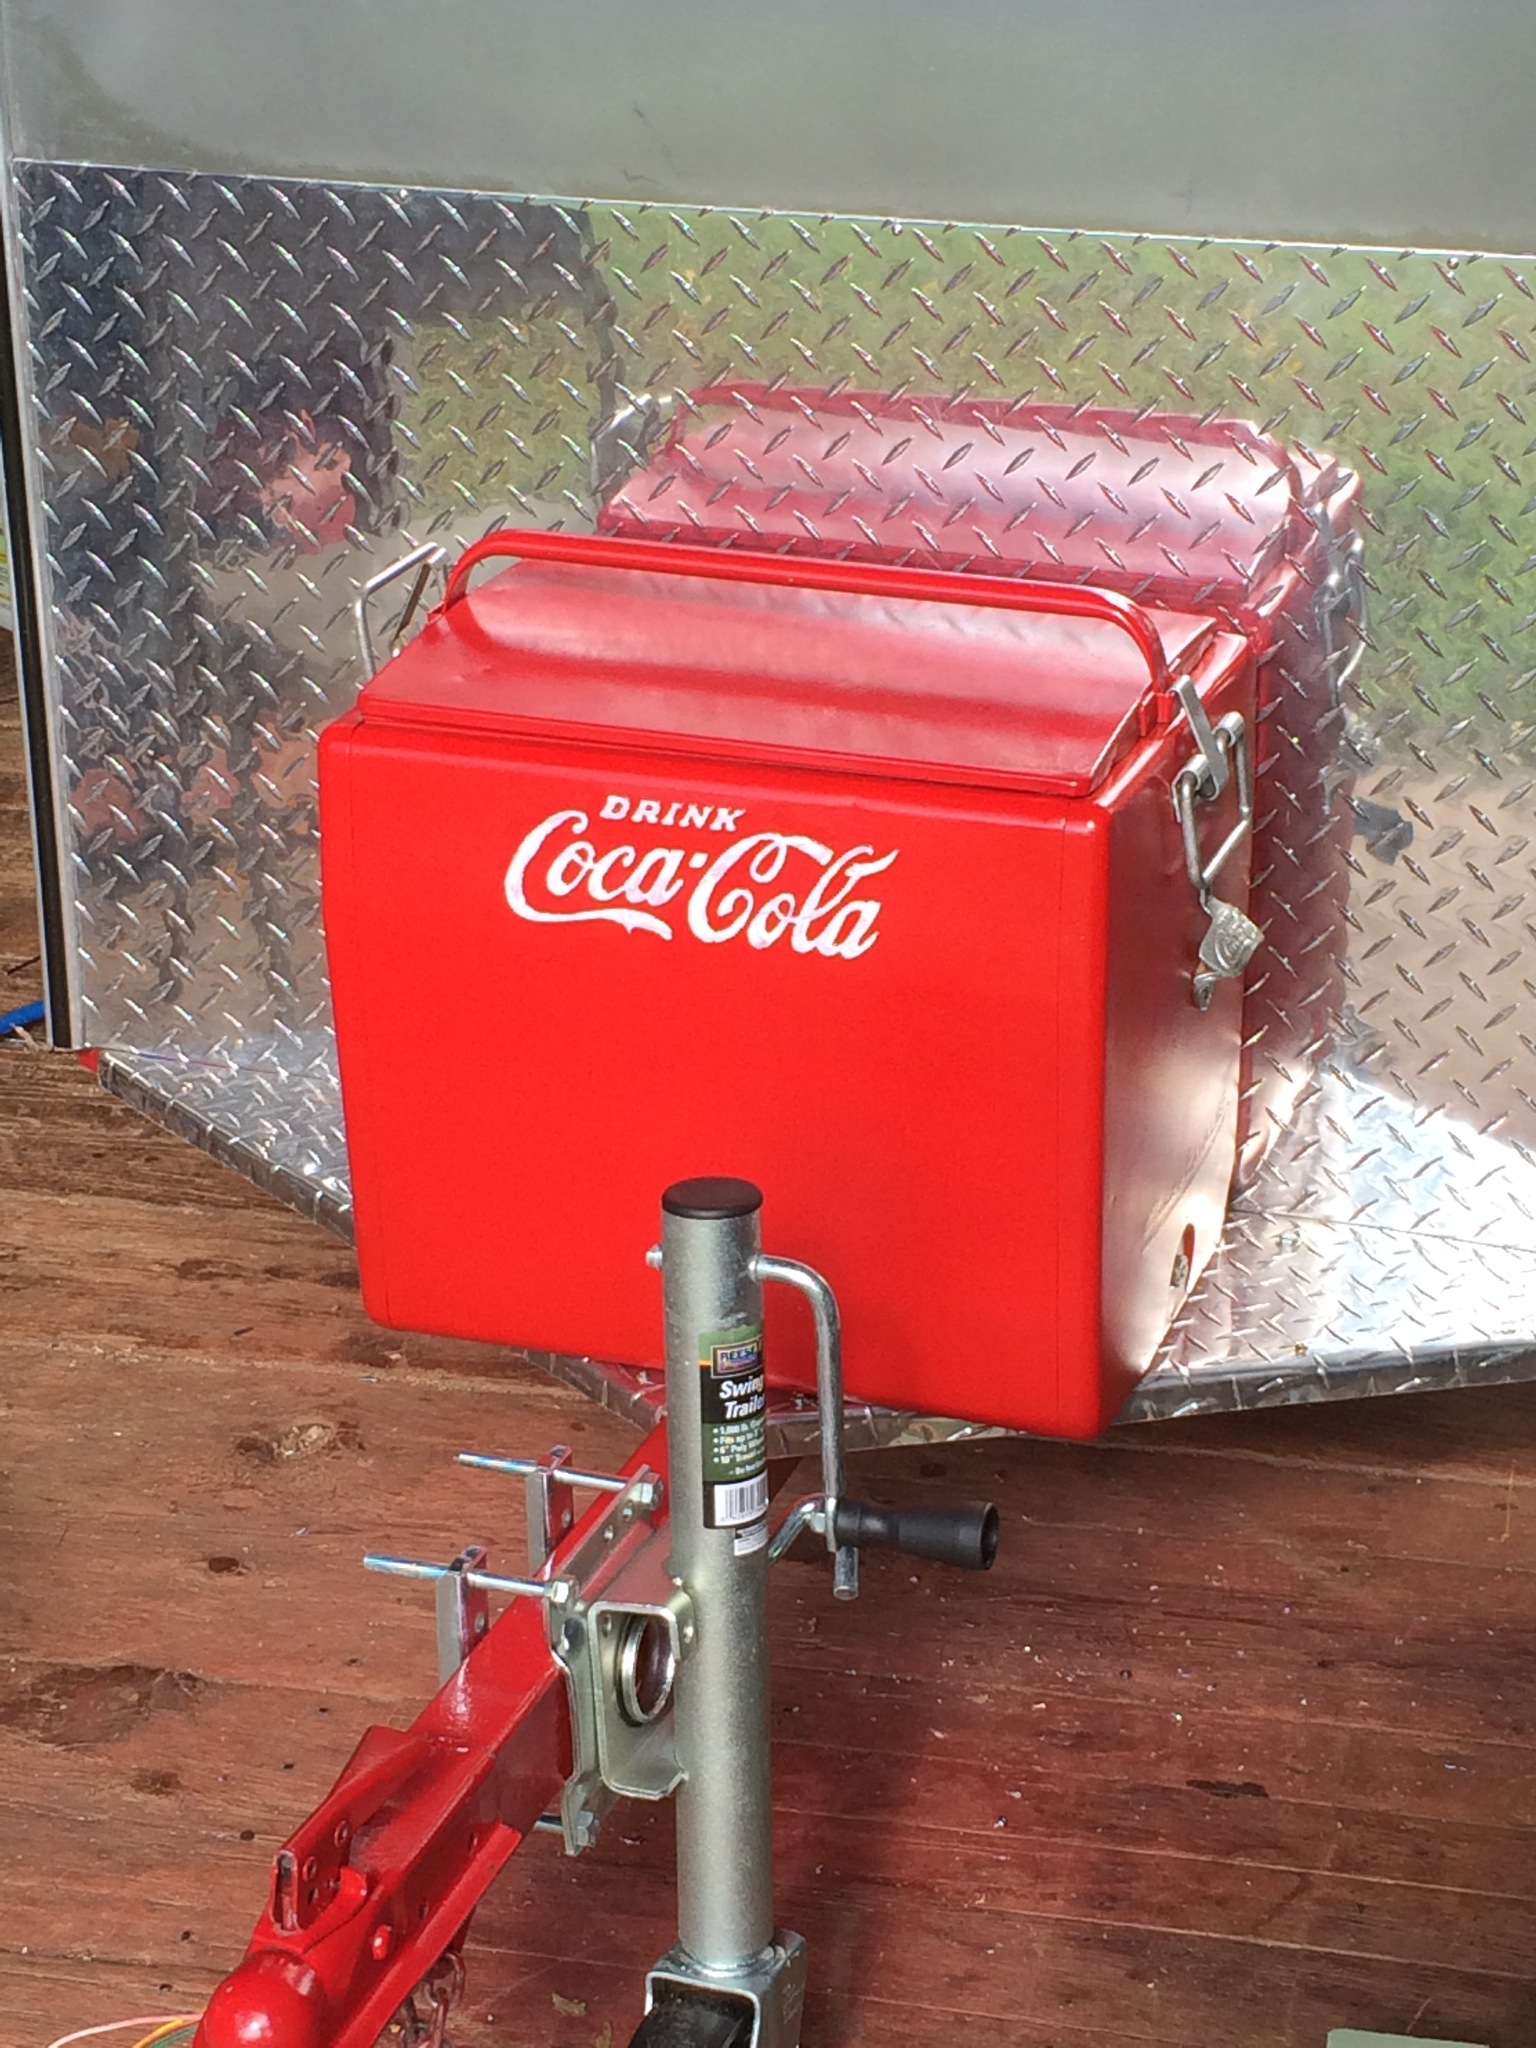
So now all the power works. Also finished the coke cooler battery box. And mounted it on a diamond plate on a welded frame.


The galley along with the interior has coats of amber shellac


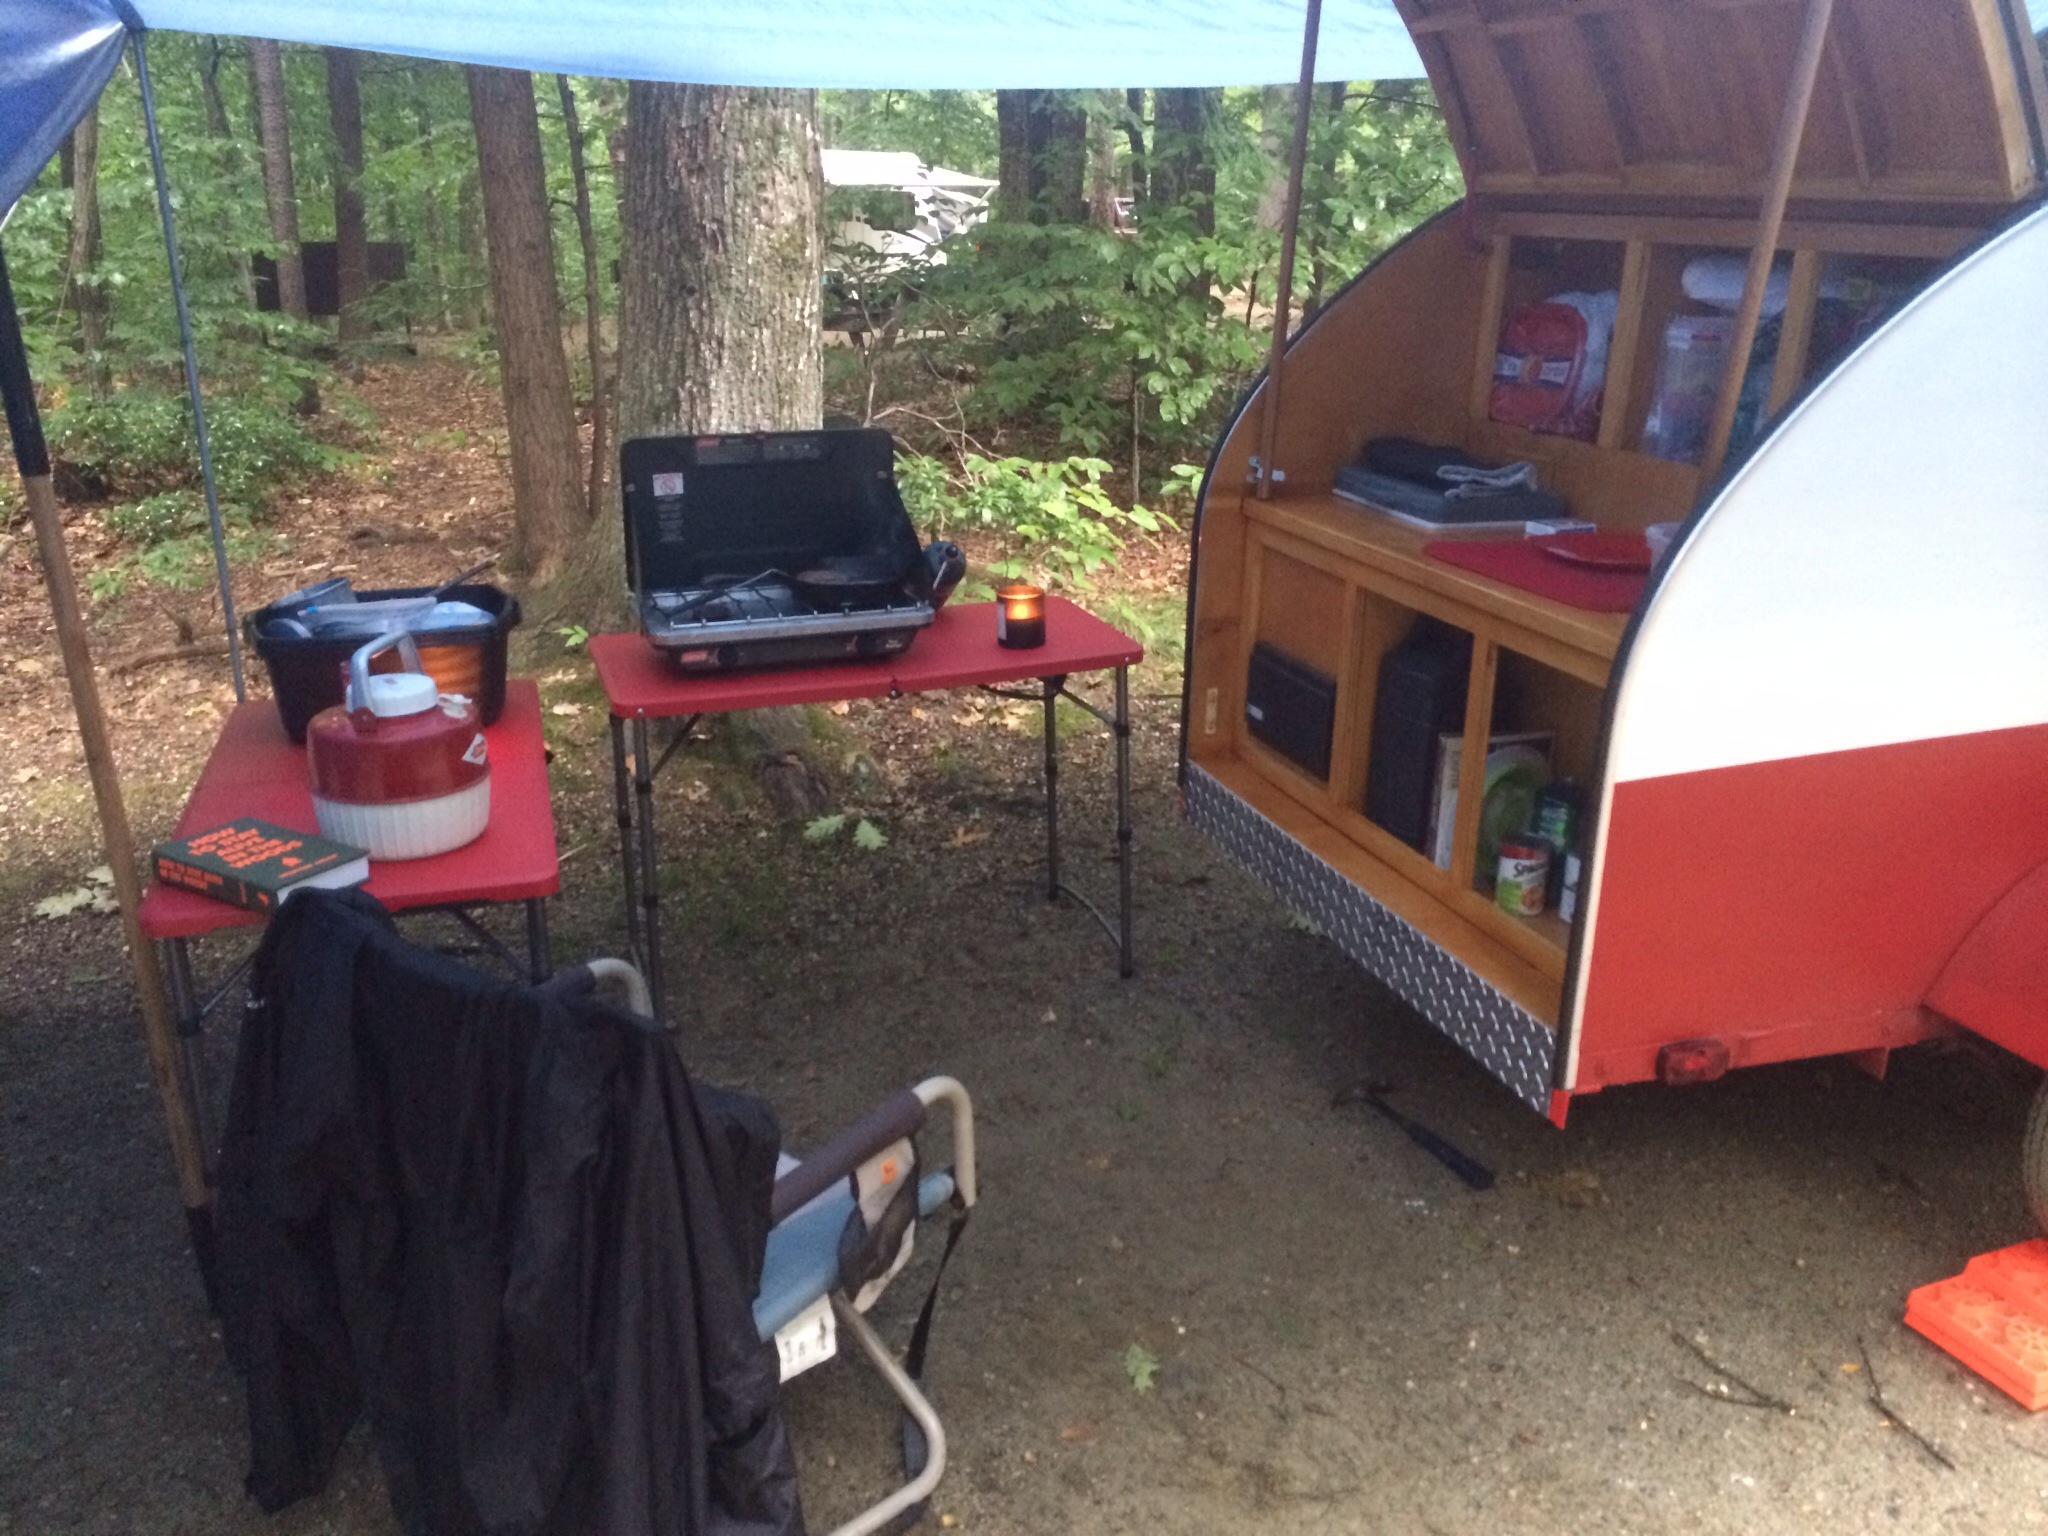
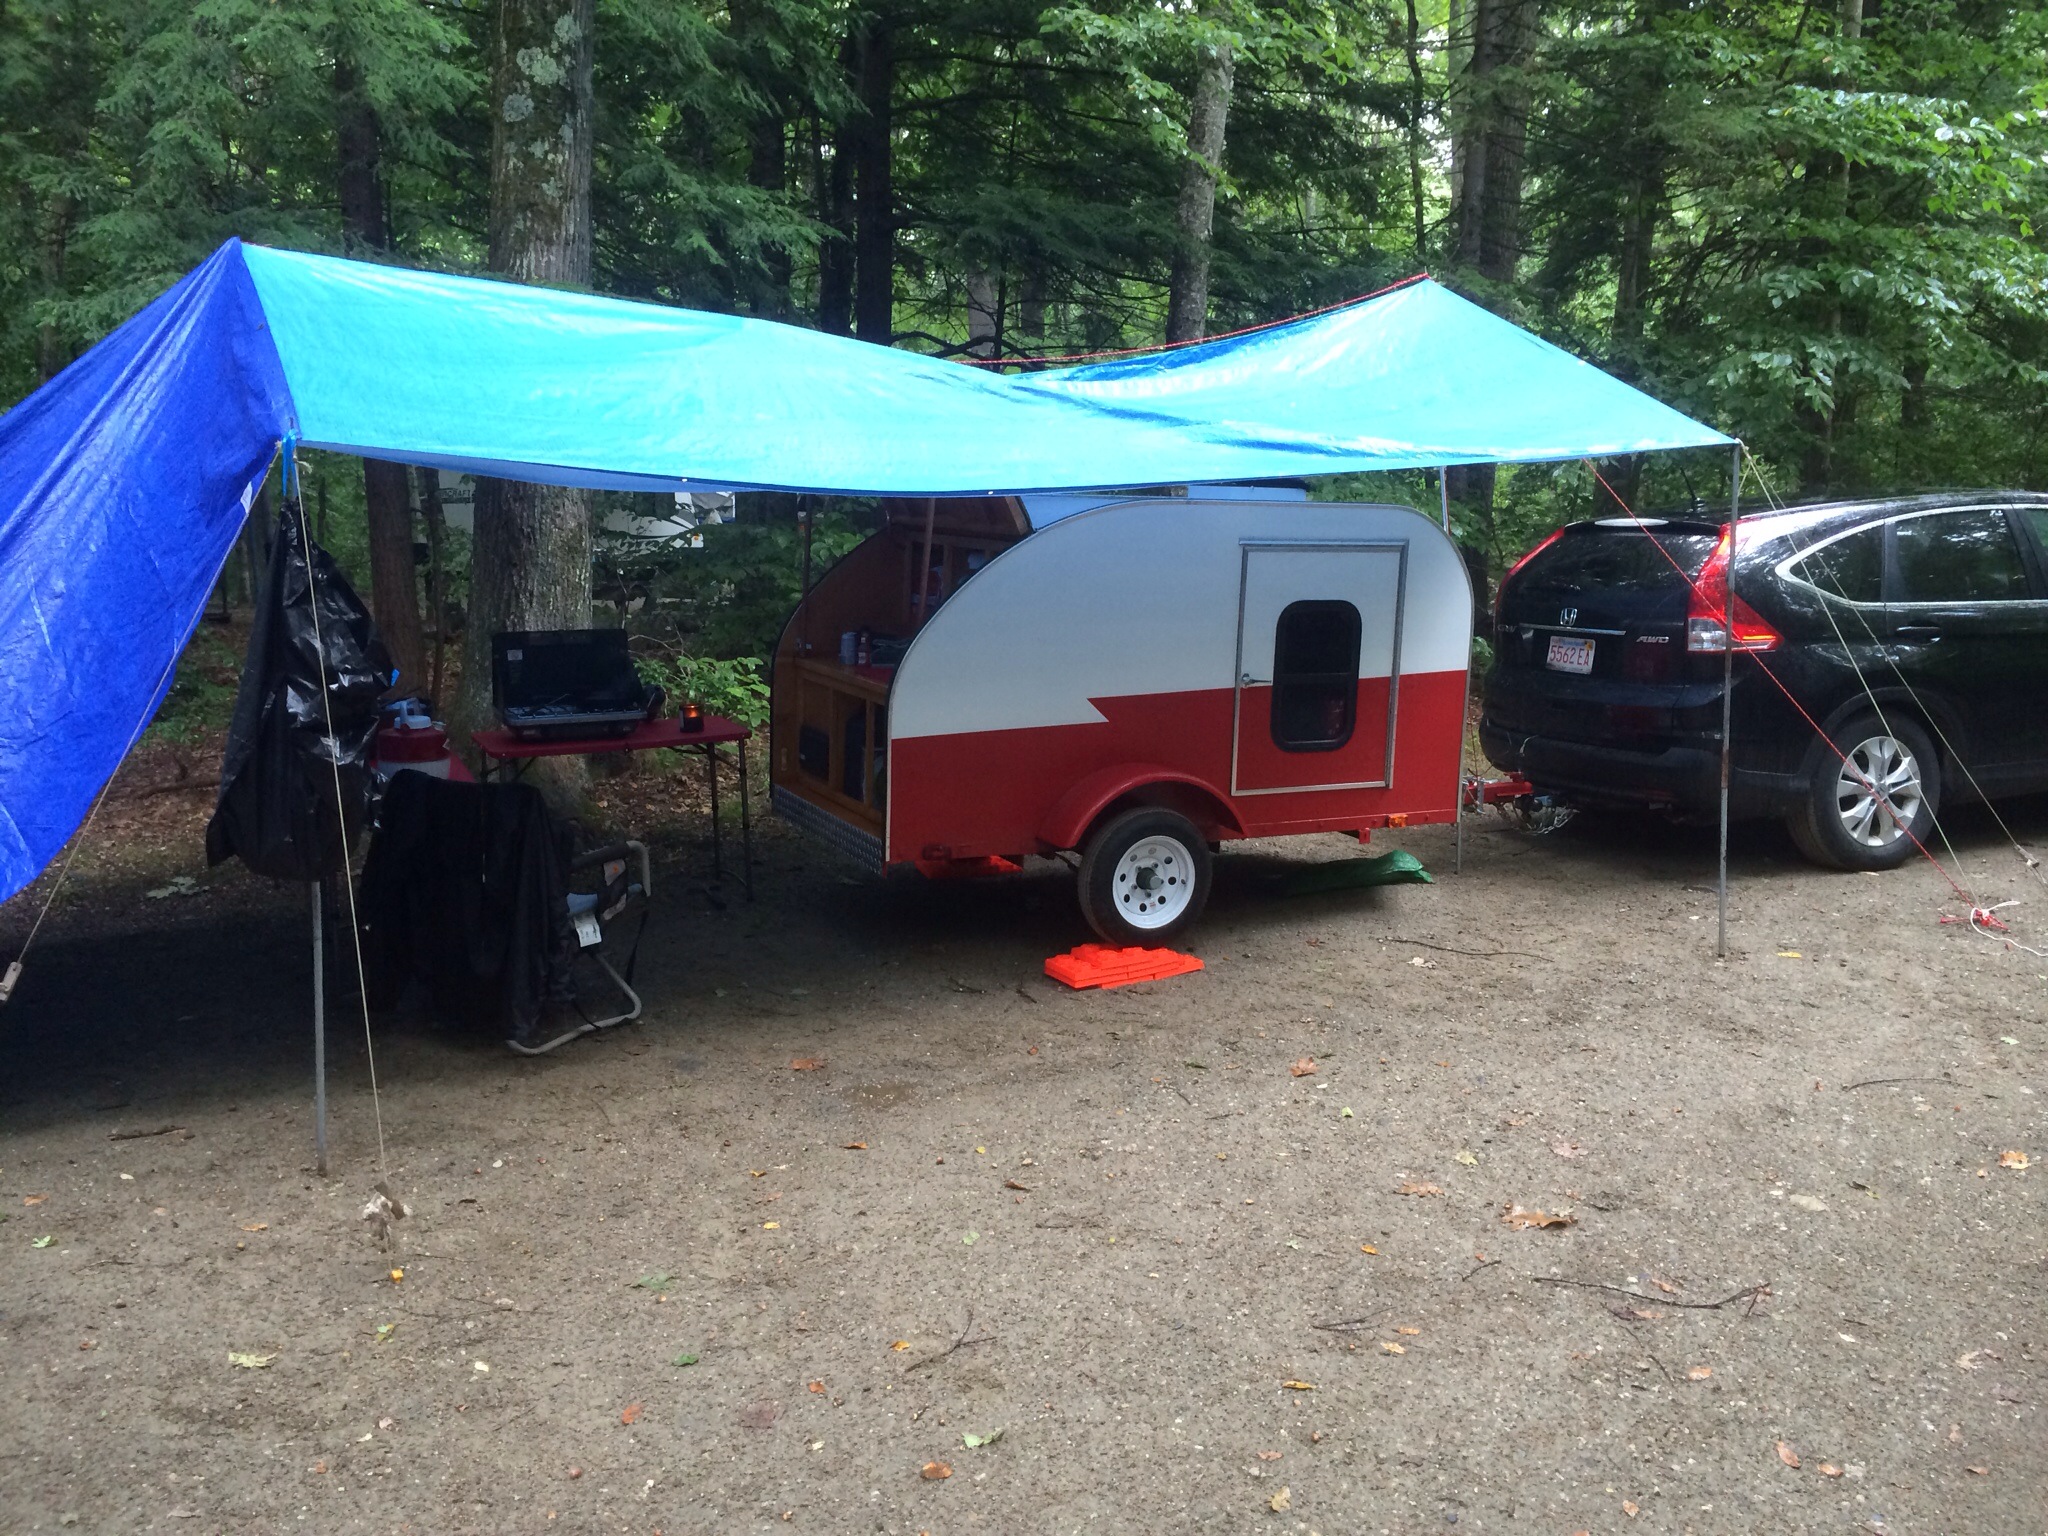
We bought a porta potty and now have a privy tent for it.

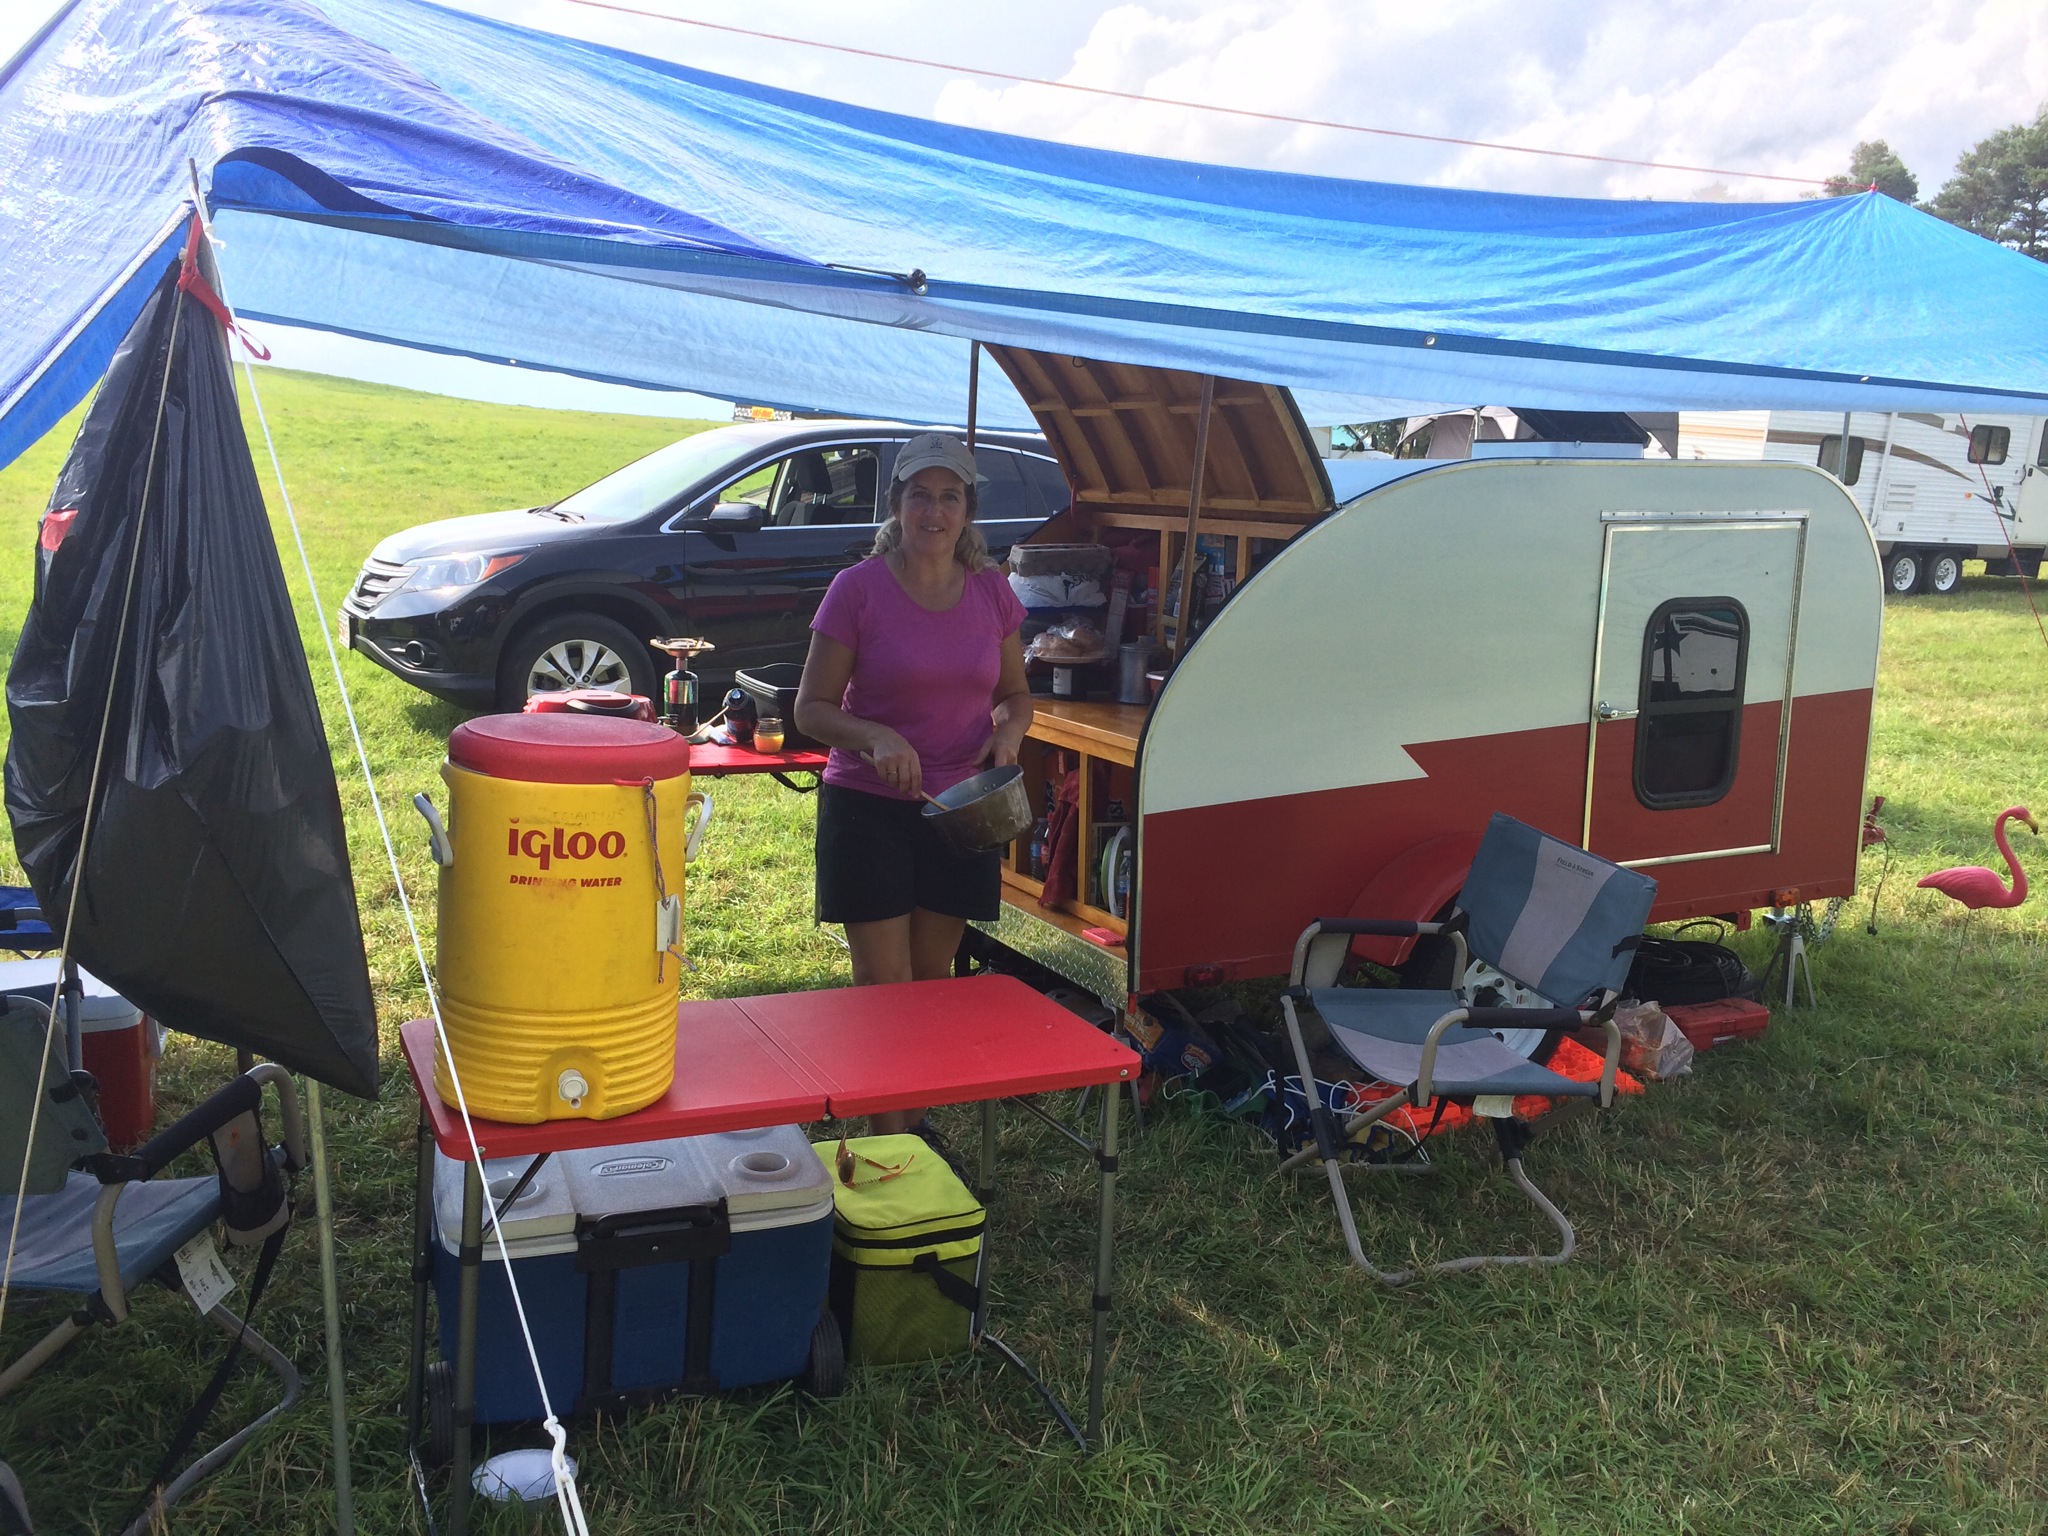
We brought it to be weighed before packing it up and it was
820 pounds !!! Not too bad!
So once packed up we were on the road for its maiden journey to NY.
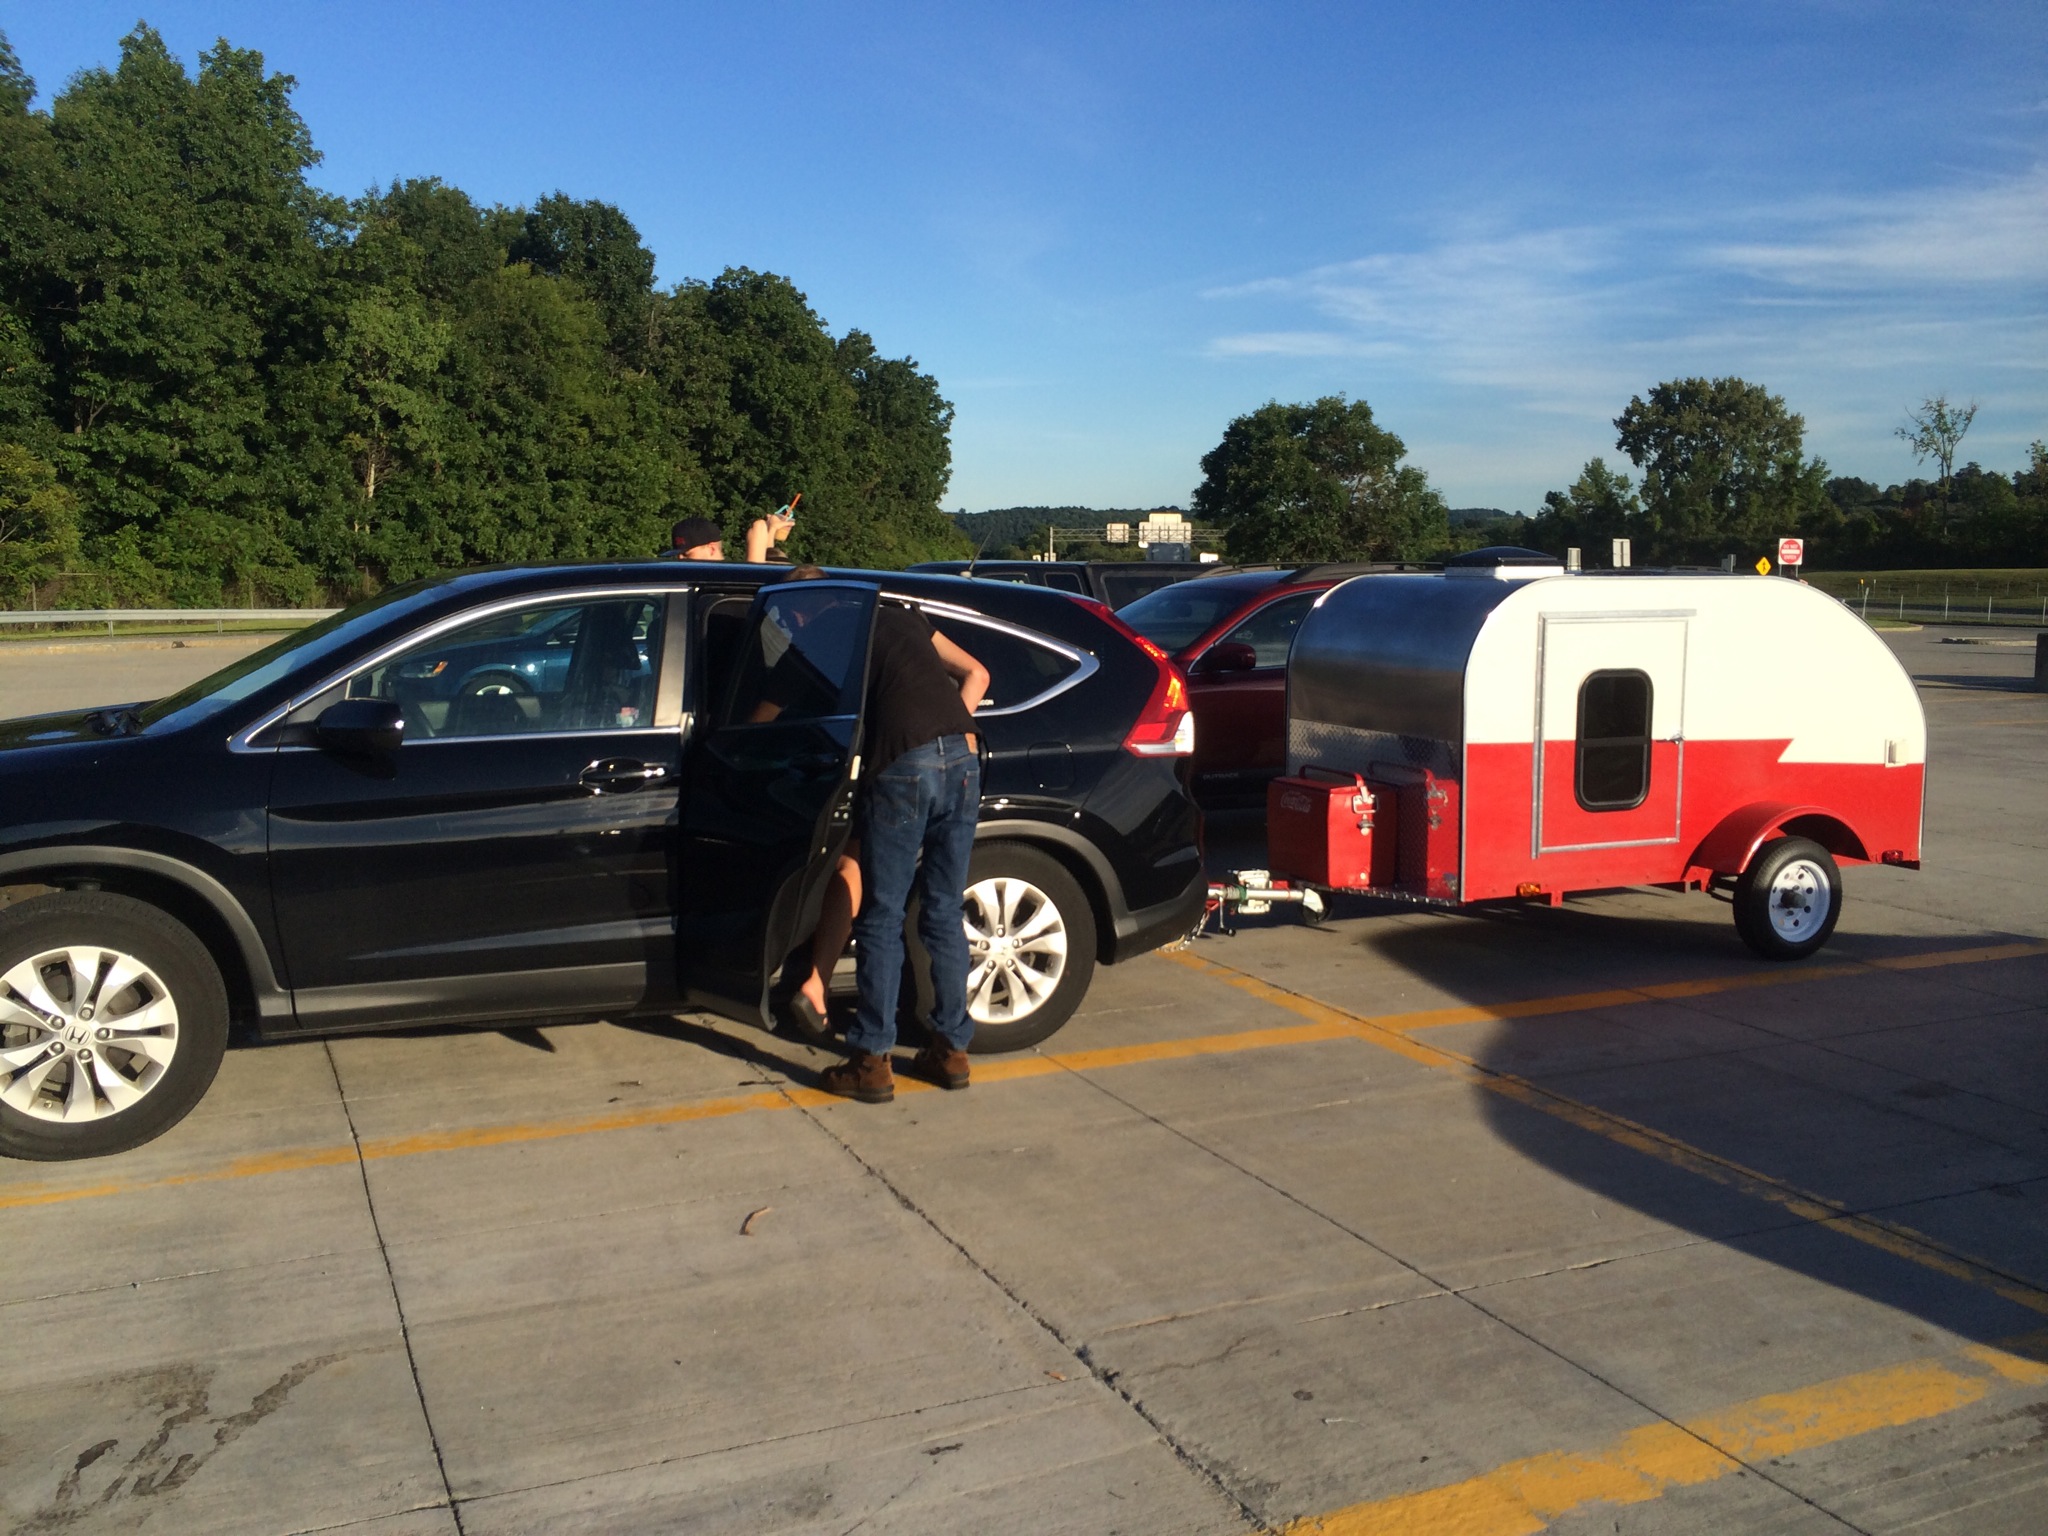
As usual we pack way too much but we are learning. Here we are with the teardrop in full use !!!


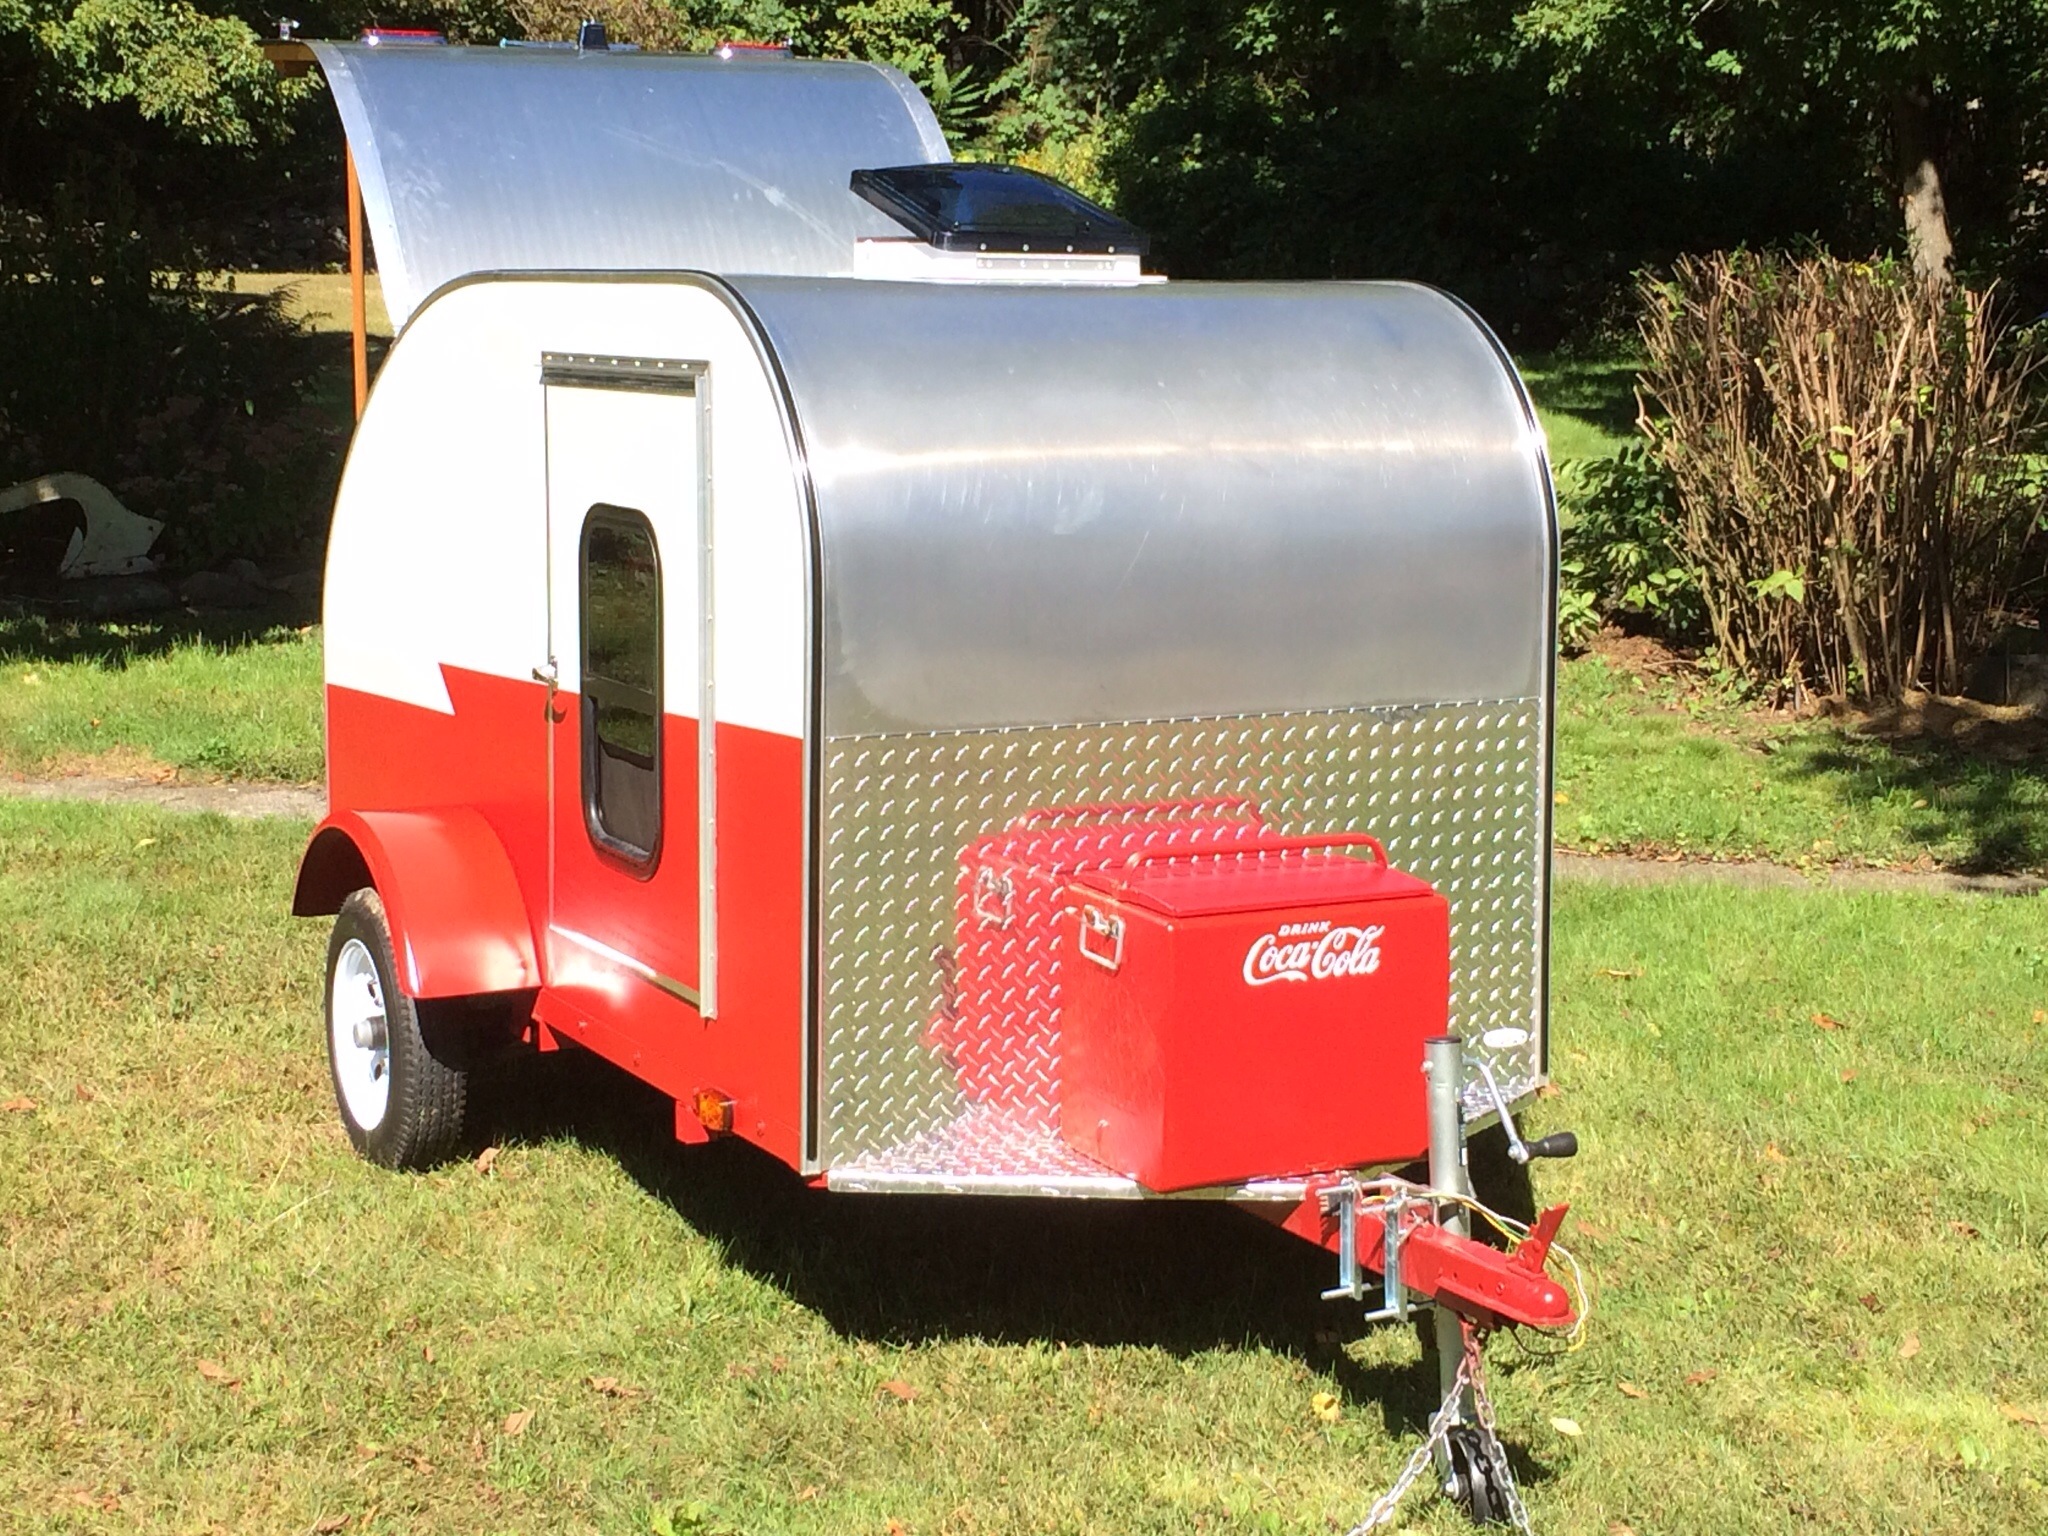
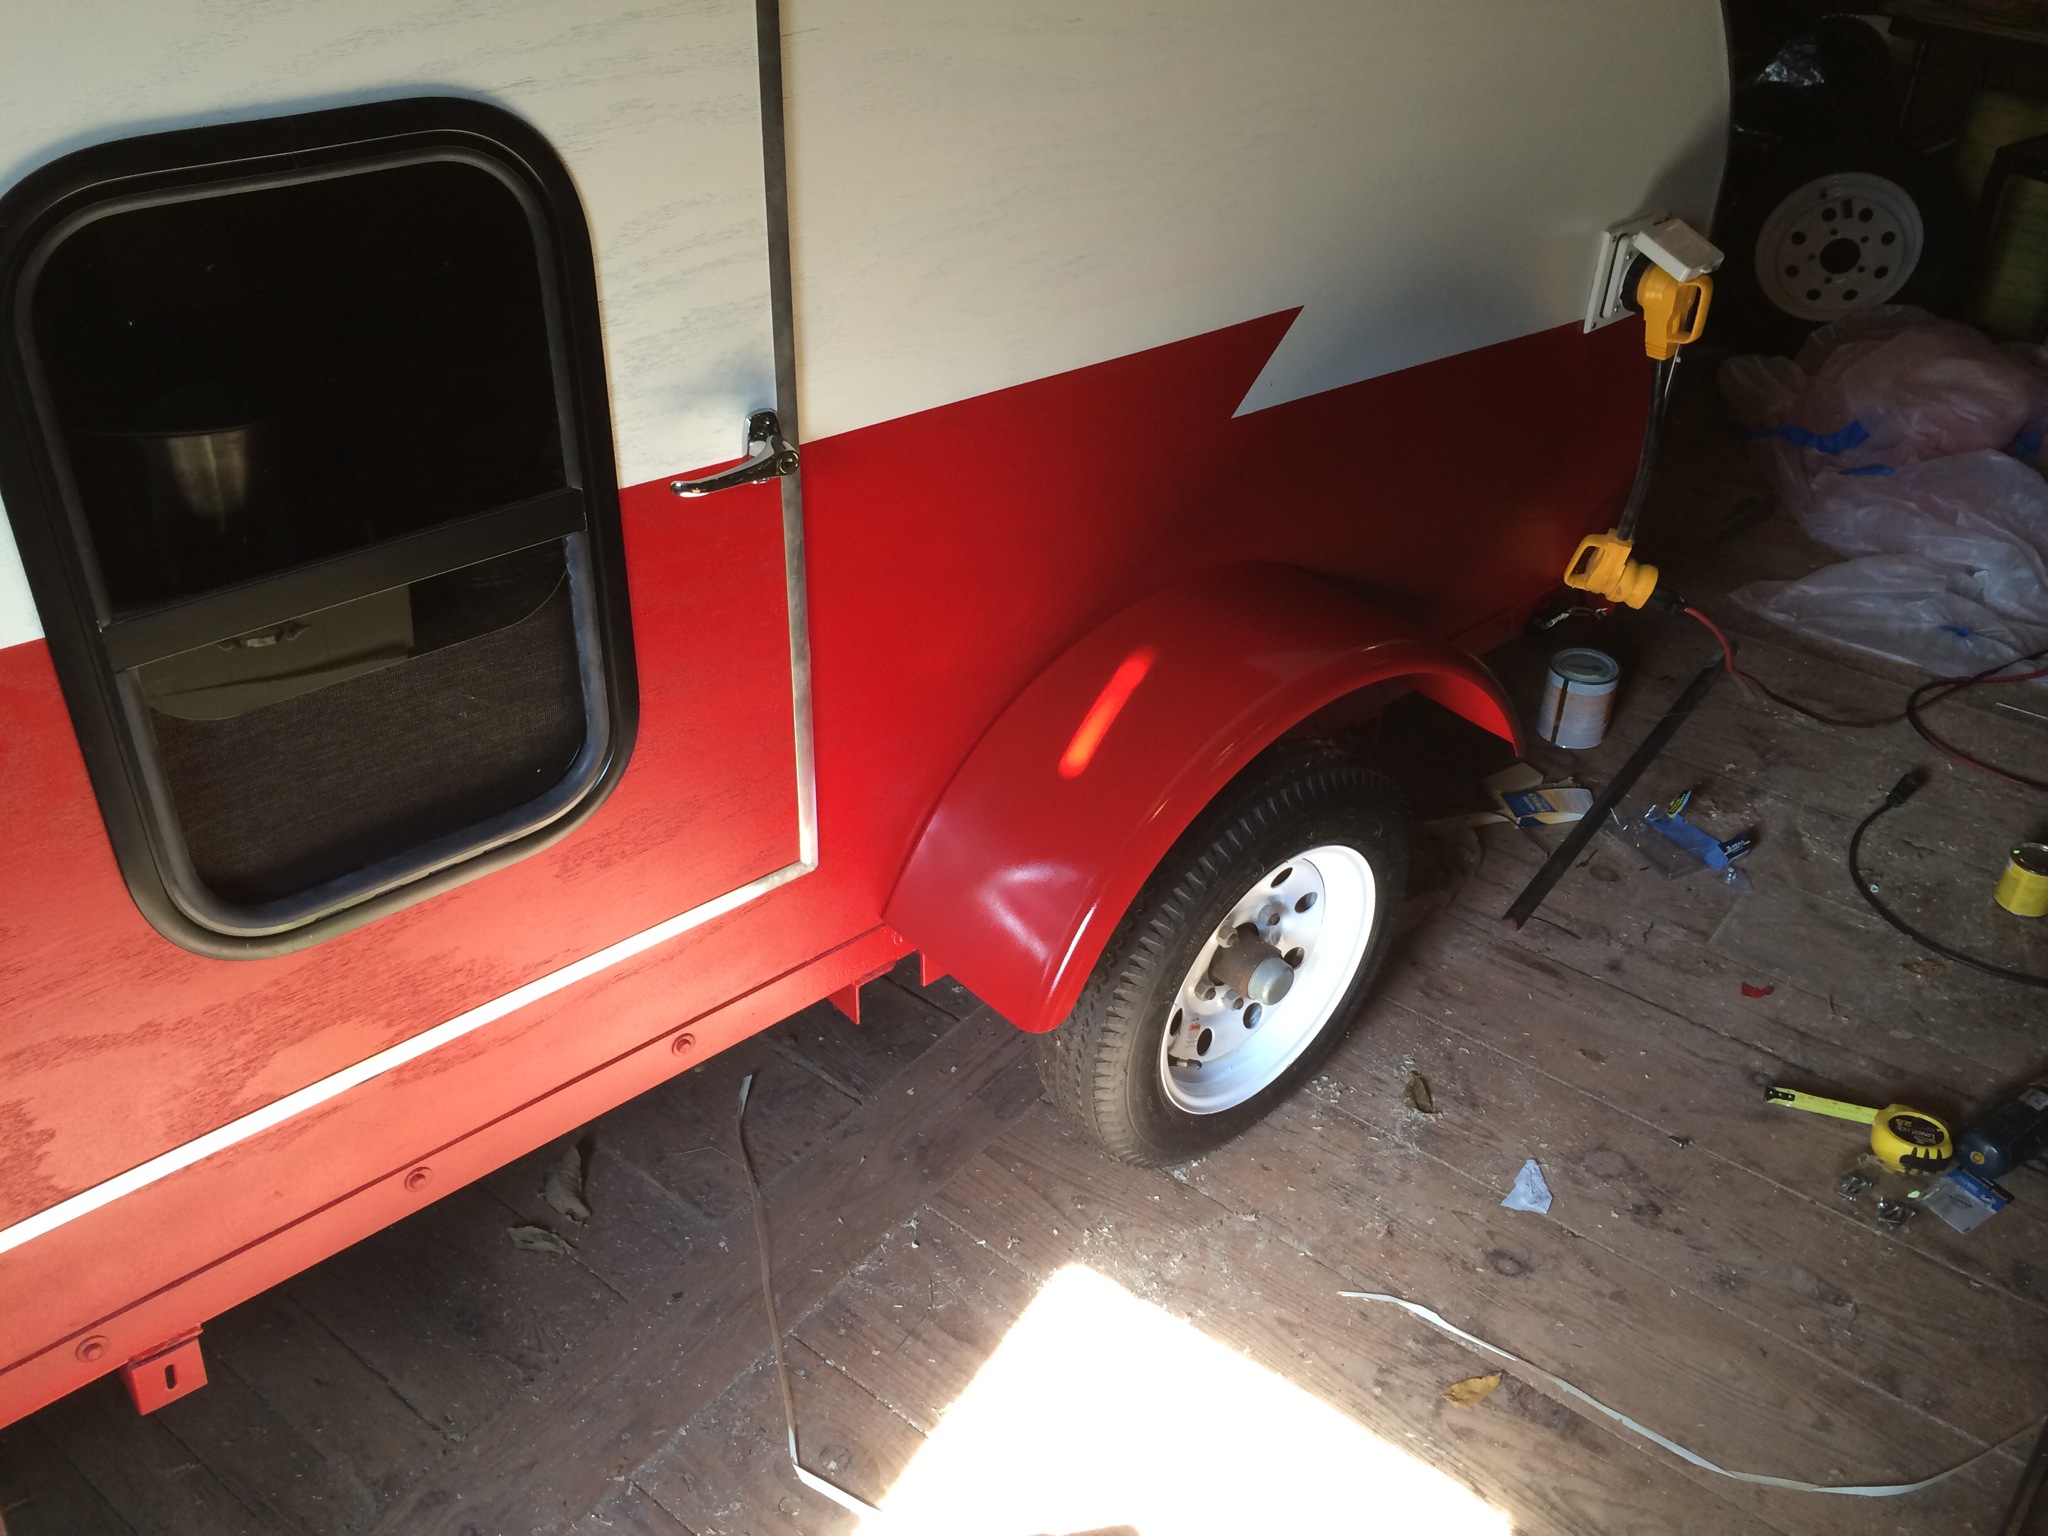
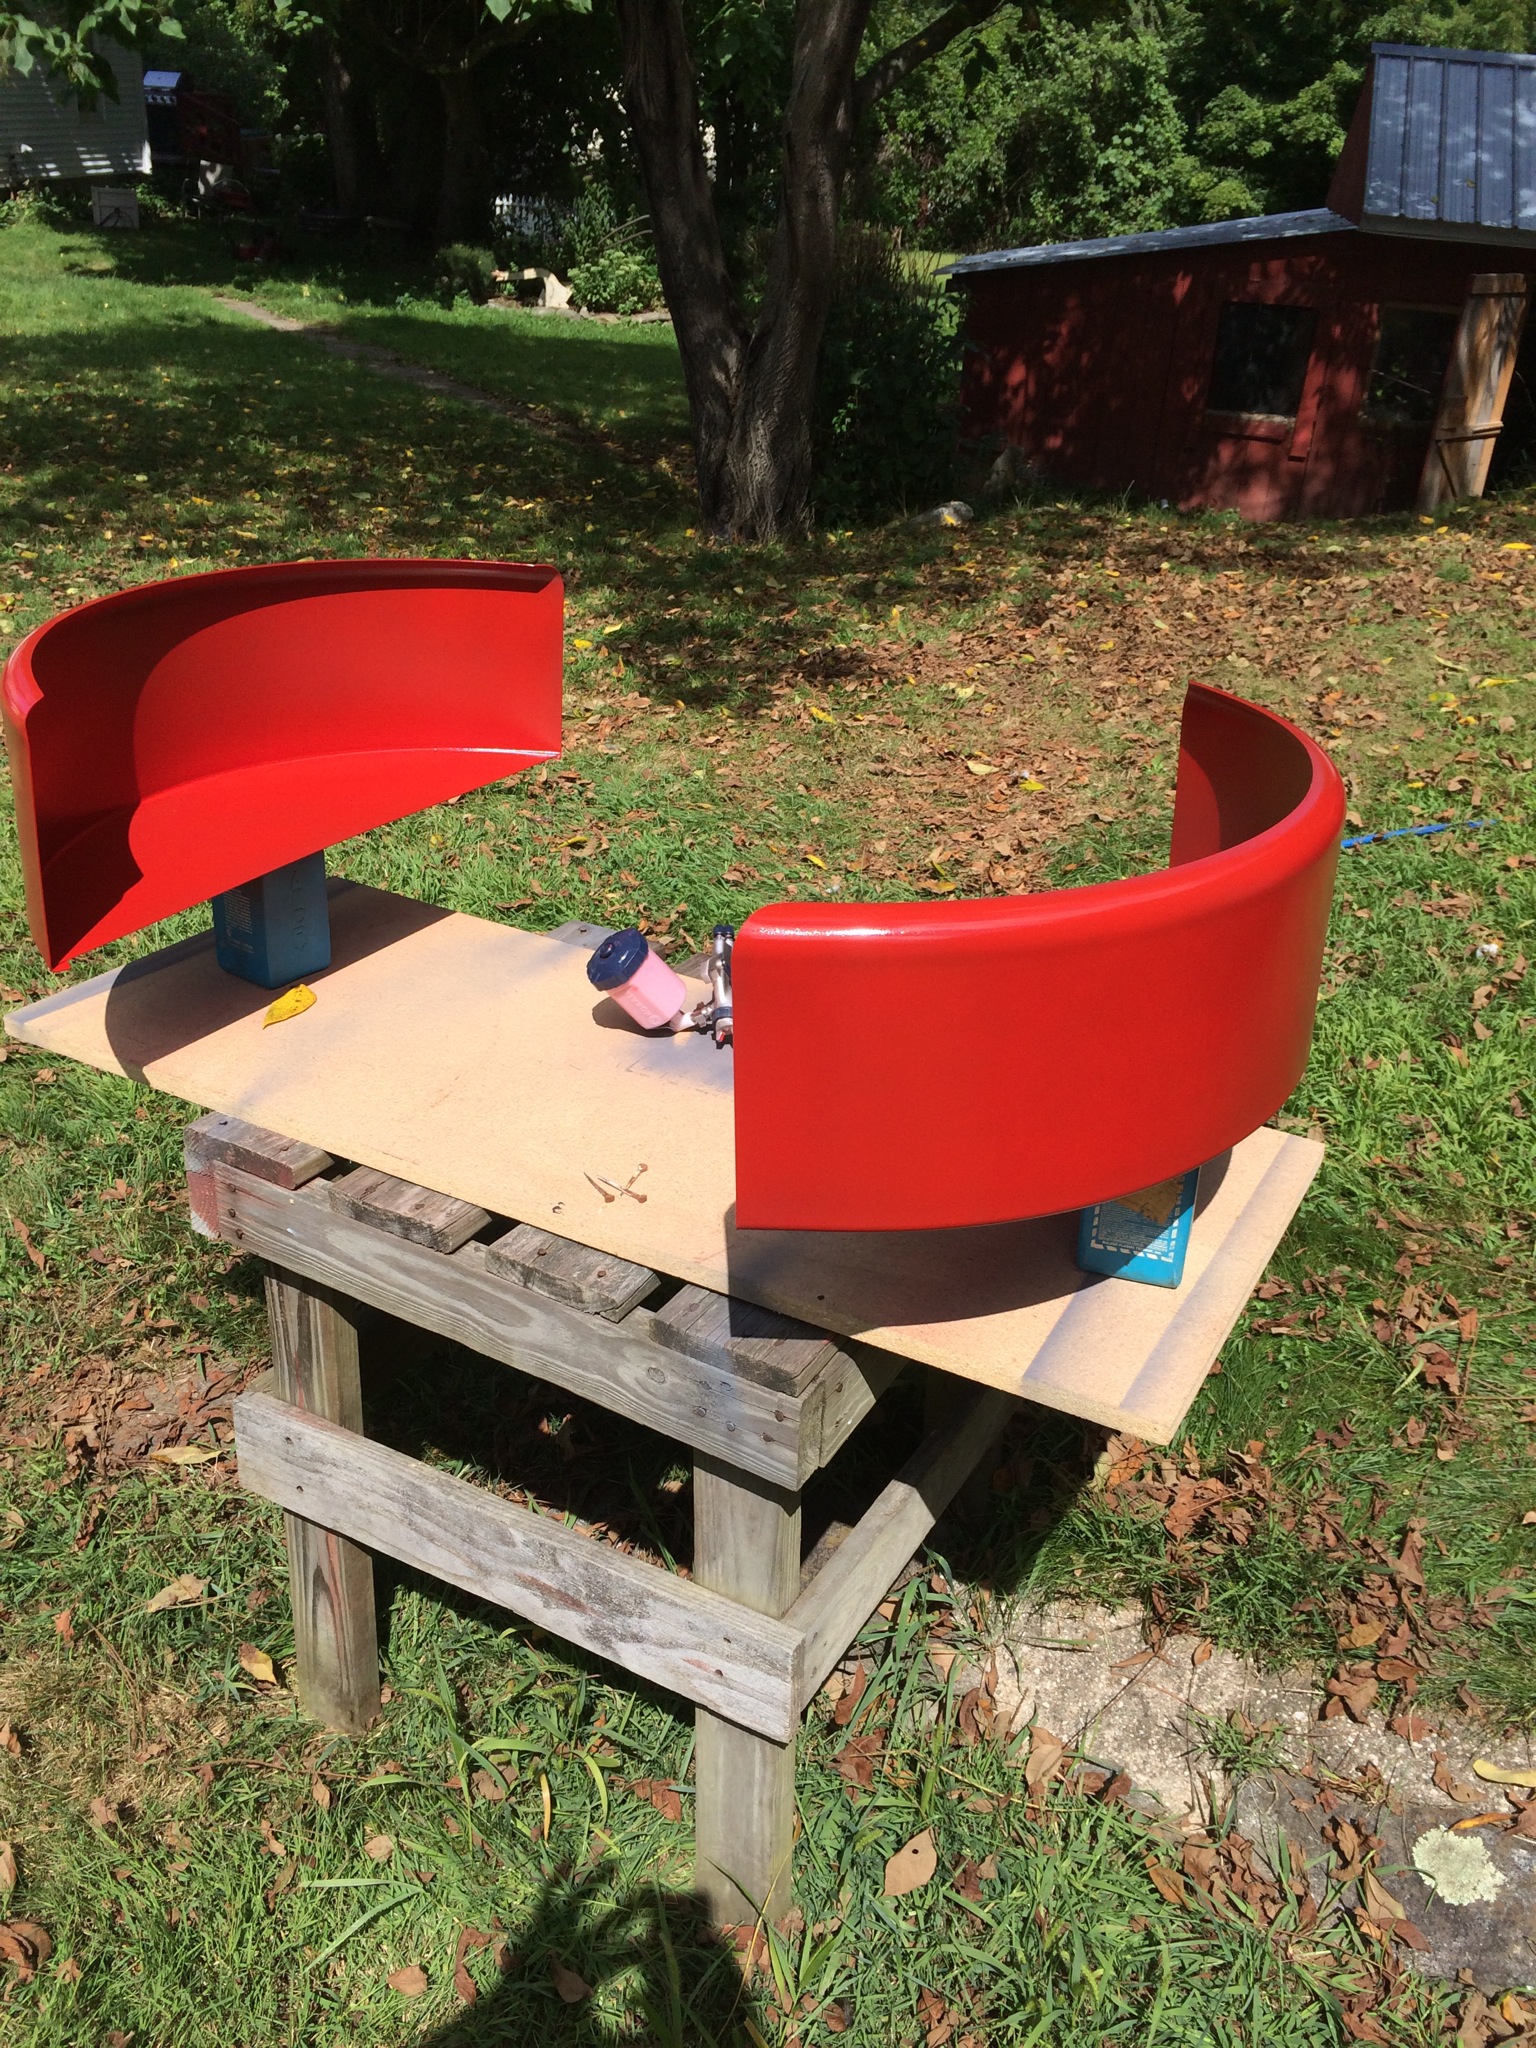
I bought fenders and got the spray gun out and painted them up. Got them mounted late today.
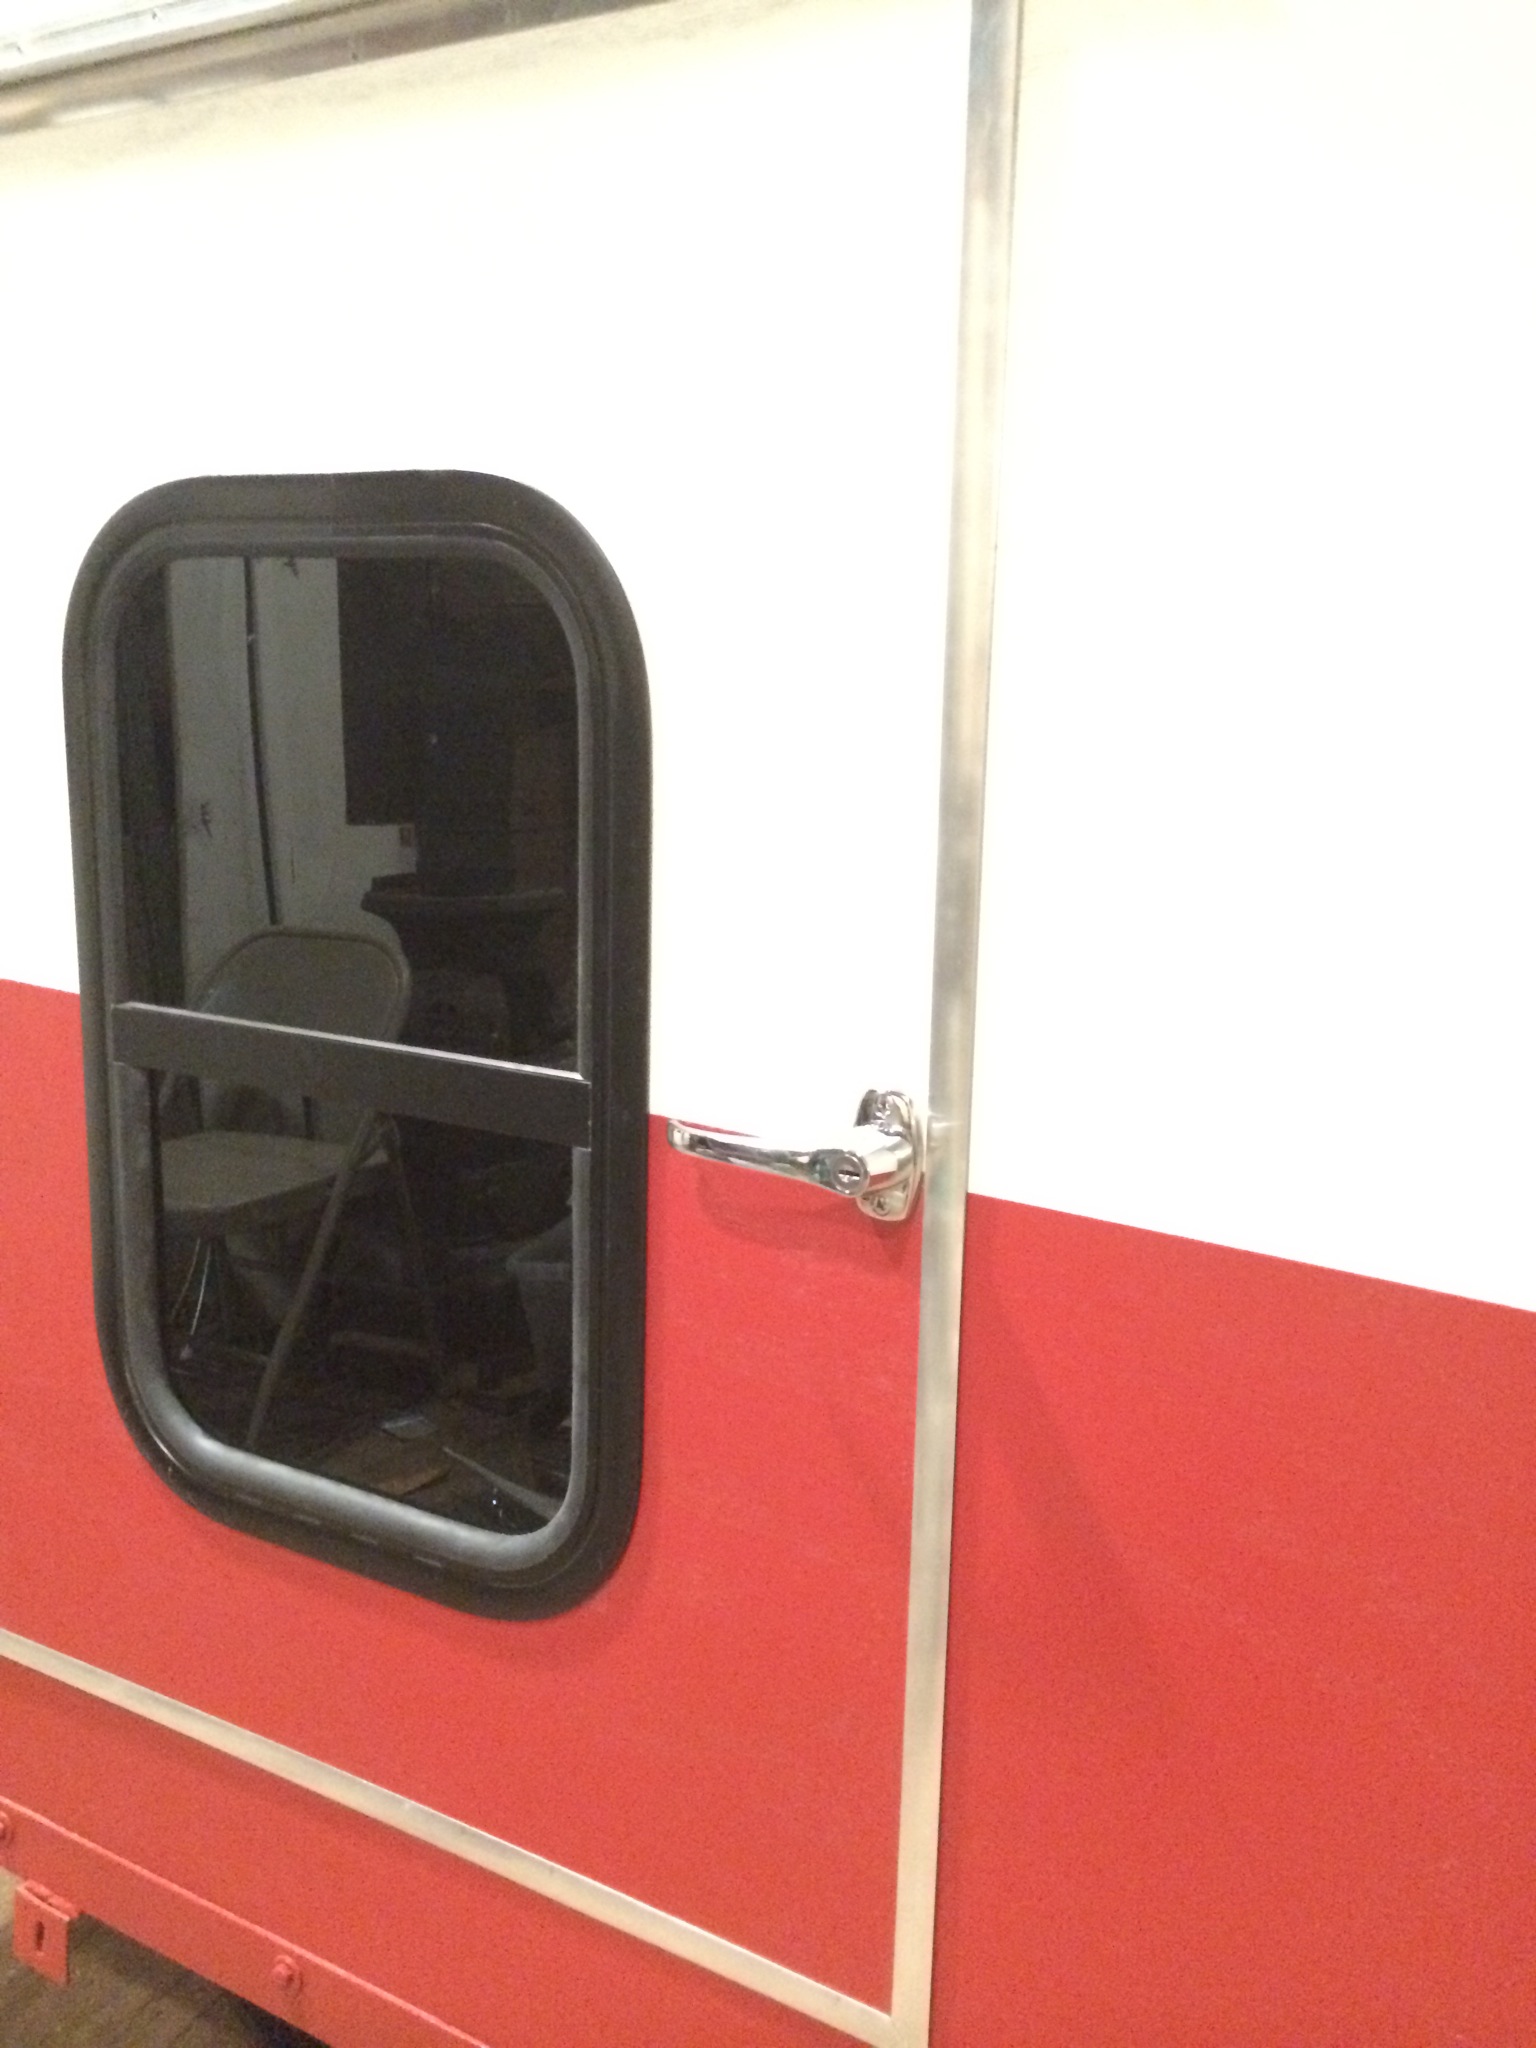
Also got all the outside lighting done. All the side marker lights and wired the hatch for the rear LED tail lights and license plate light.
Mounted the license plate in a chrome frame. More pictures of that to come


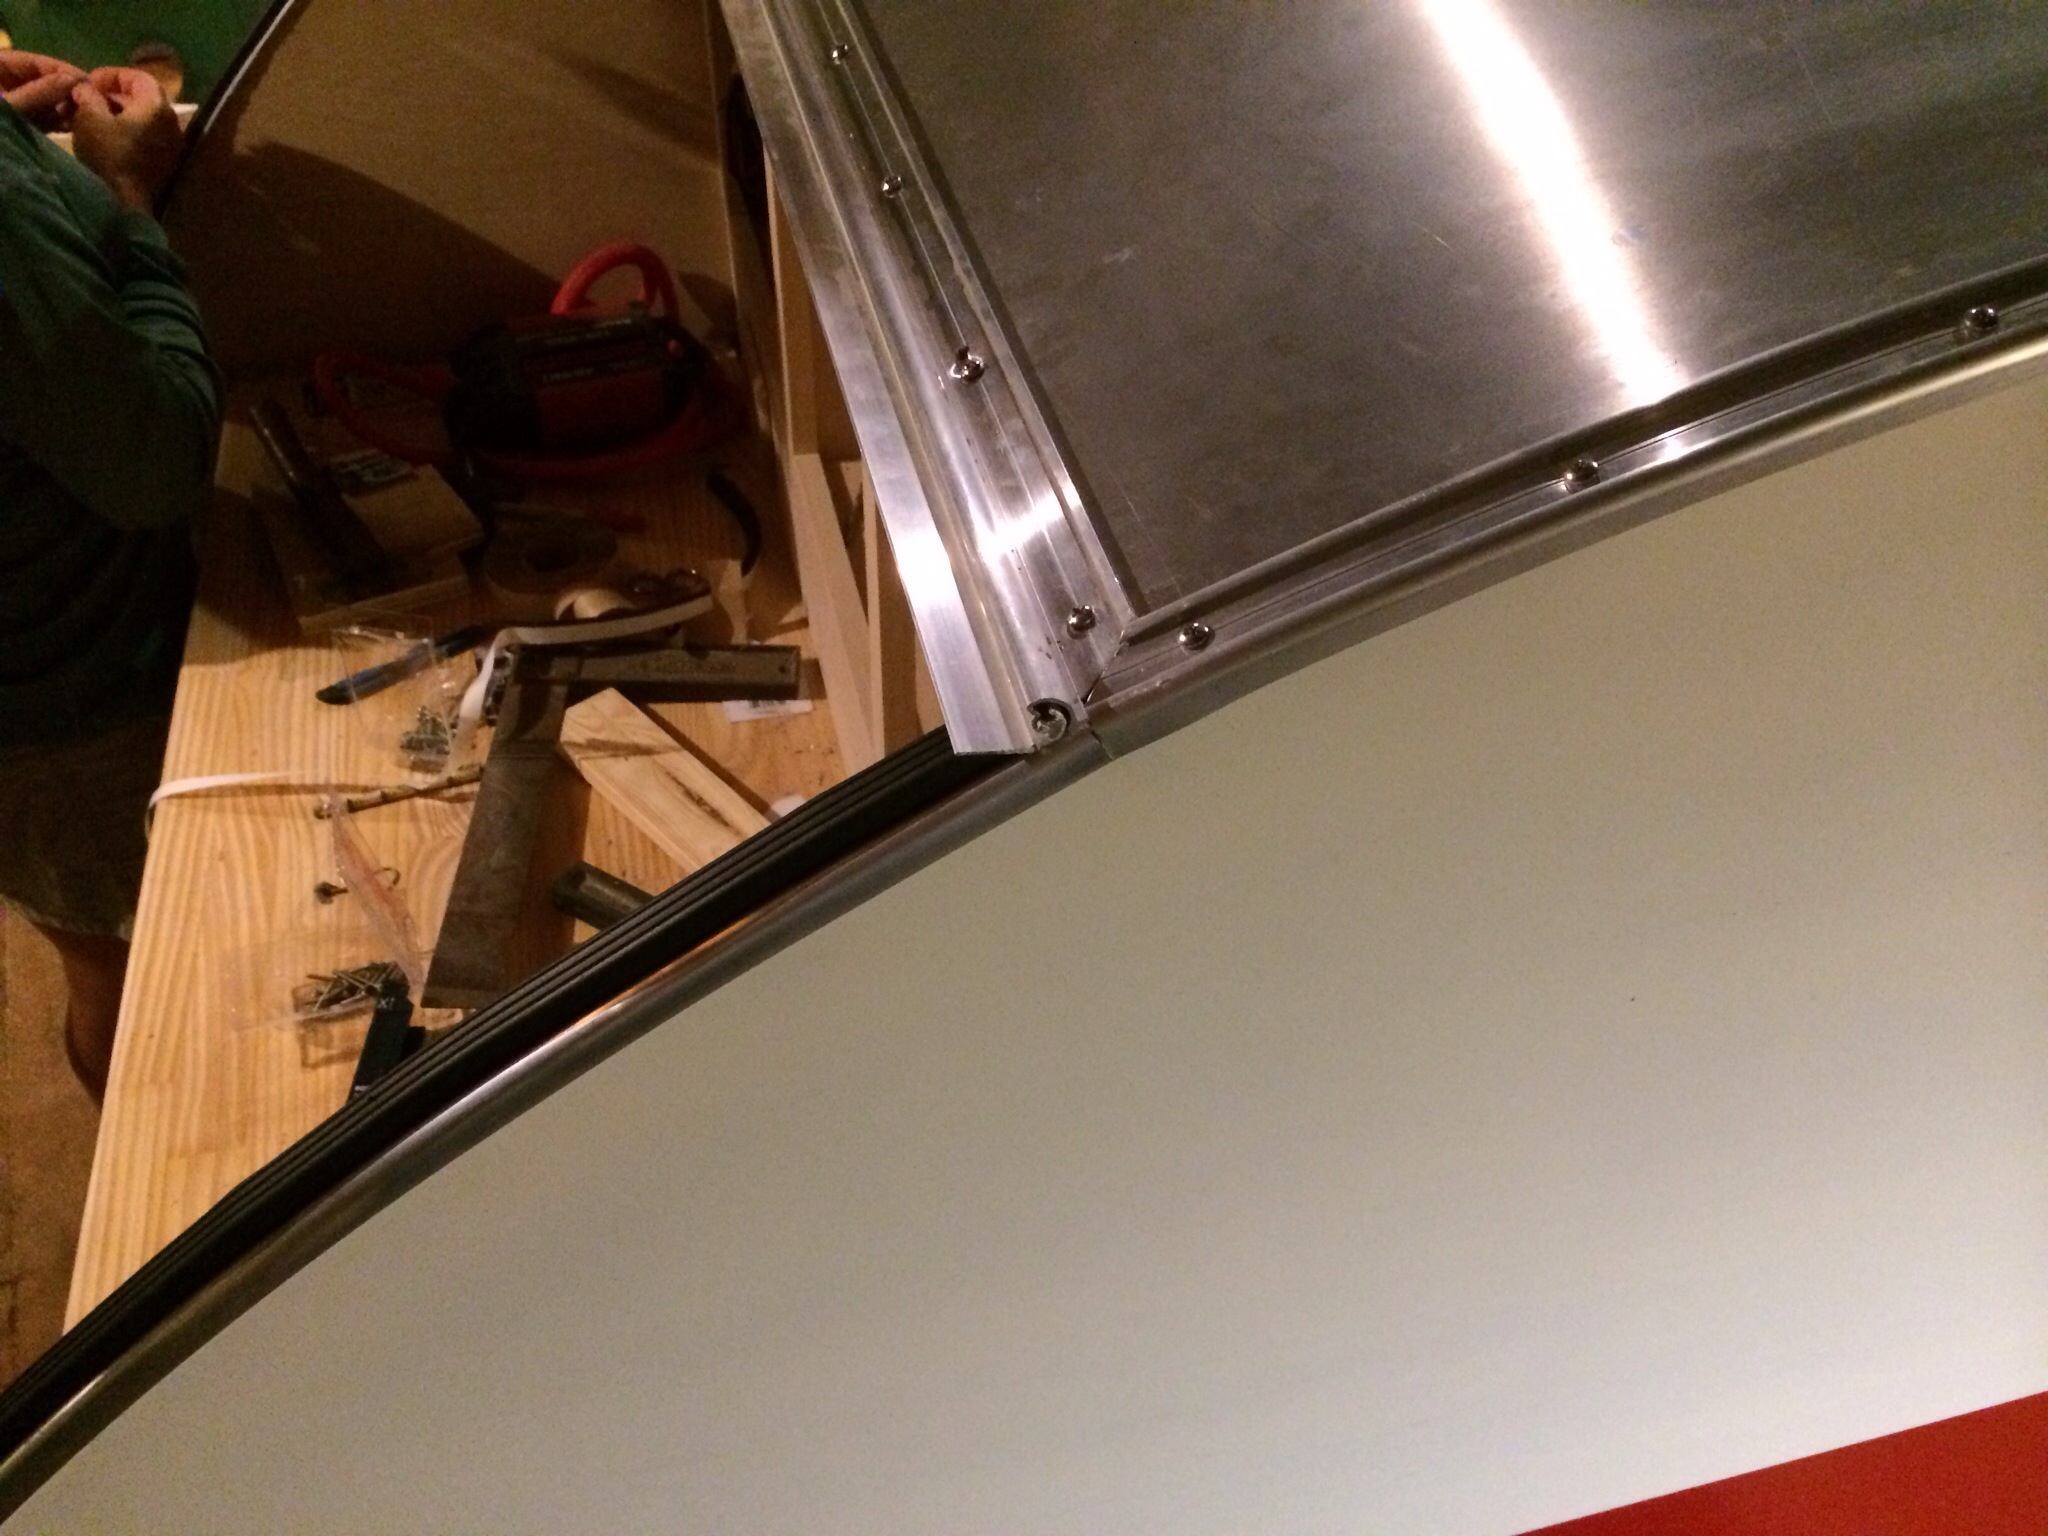
Also installed the black trim inset over the roof rails
Here is the roof trim and hatch hinge and seal.

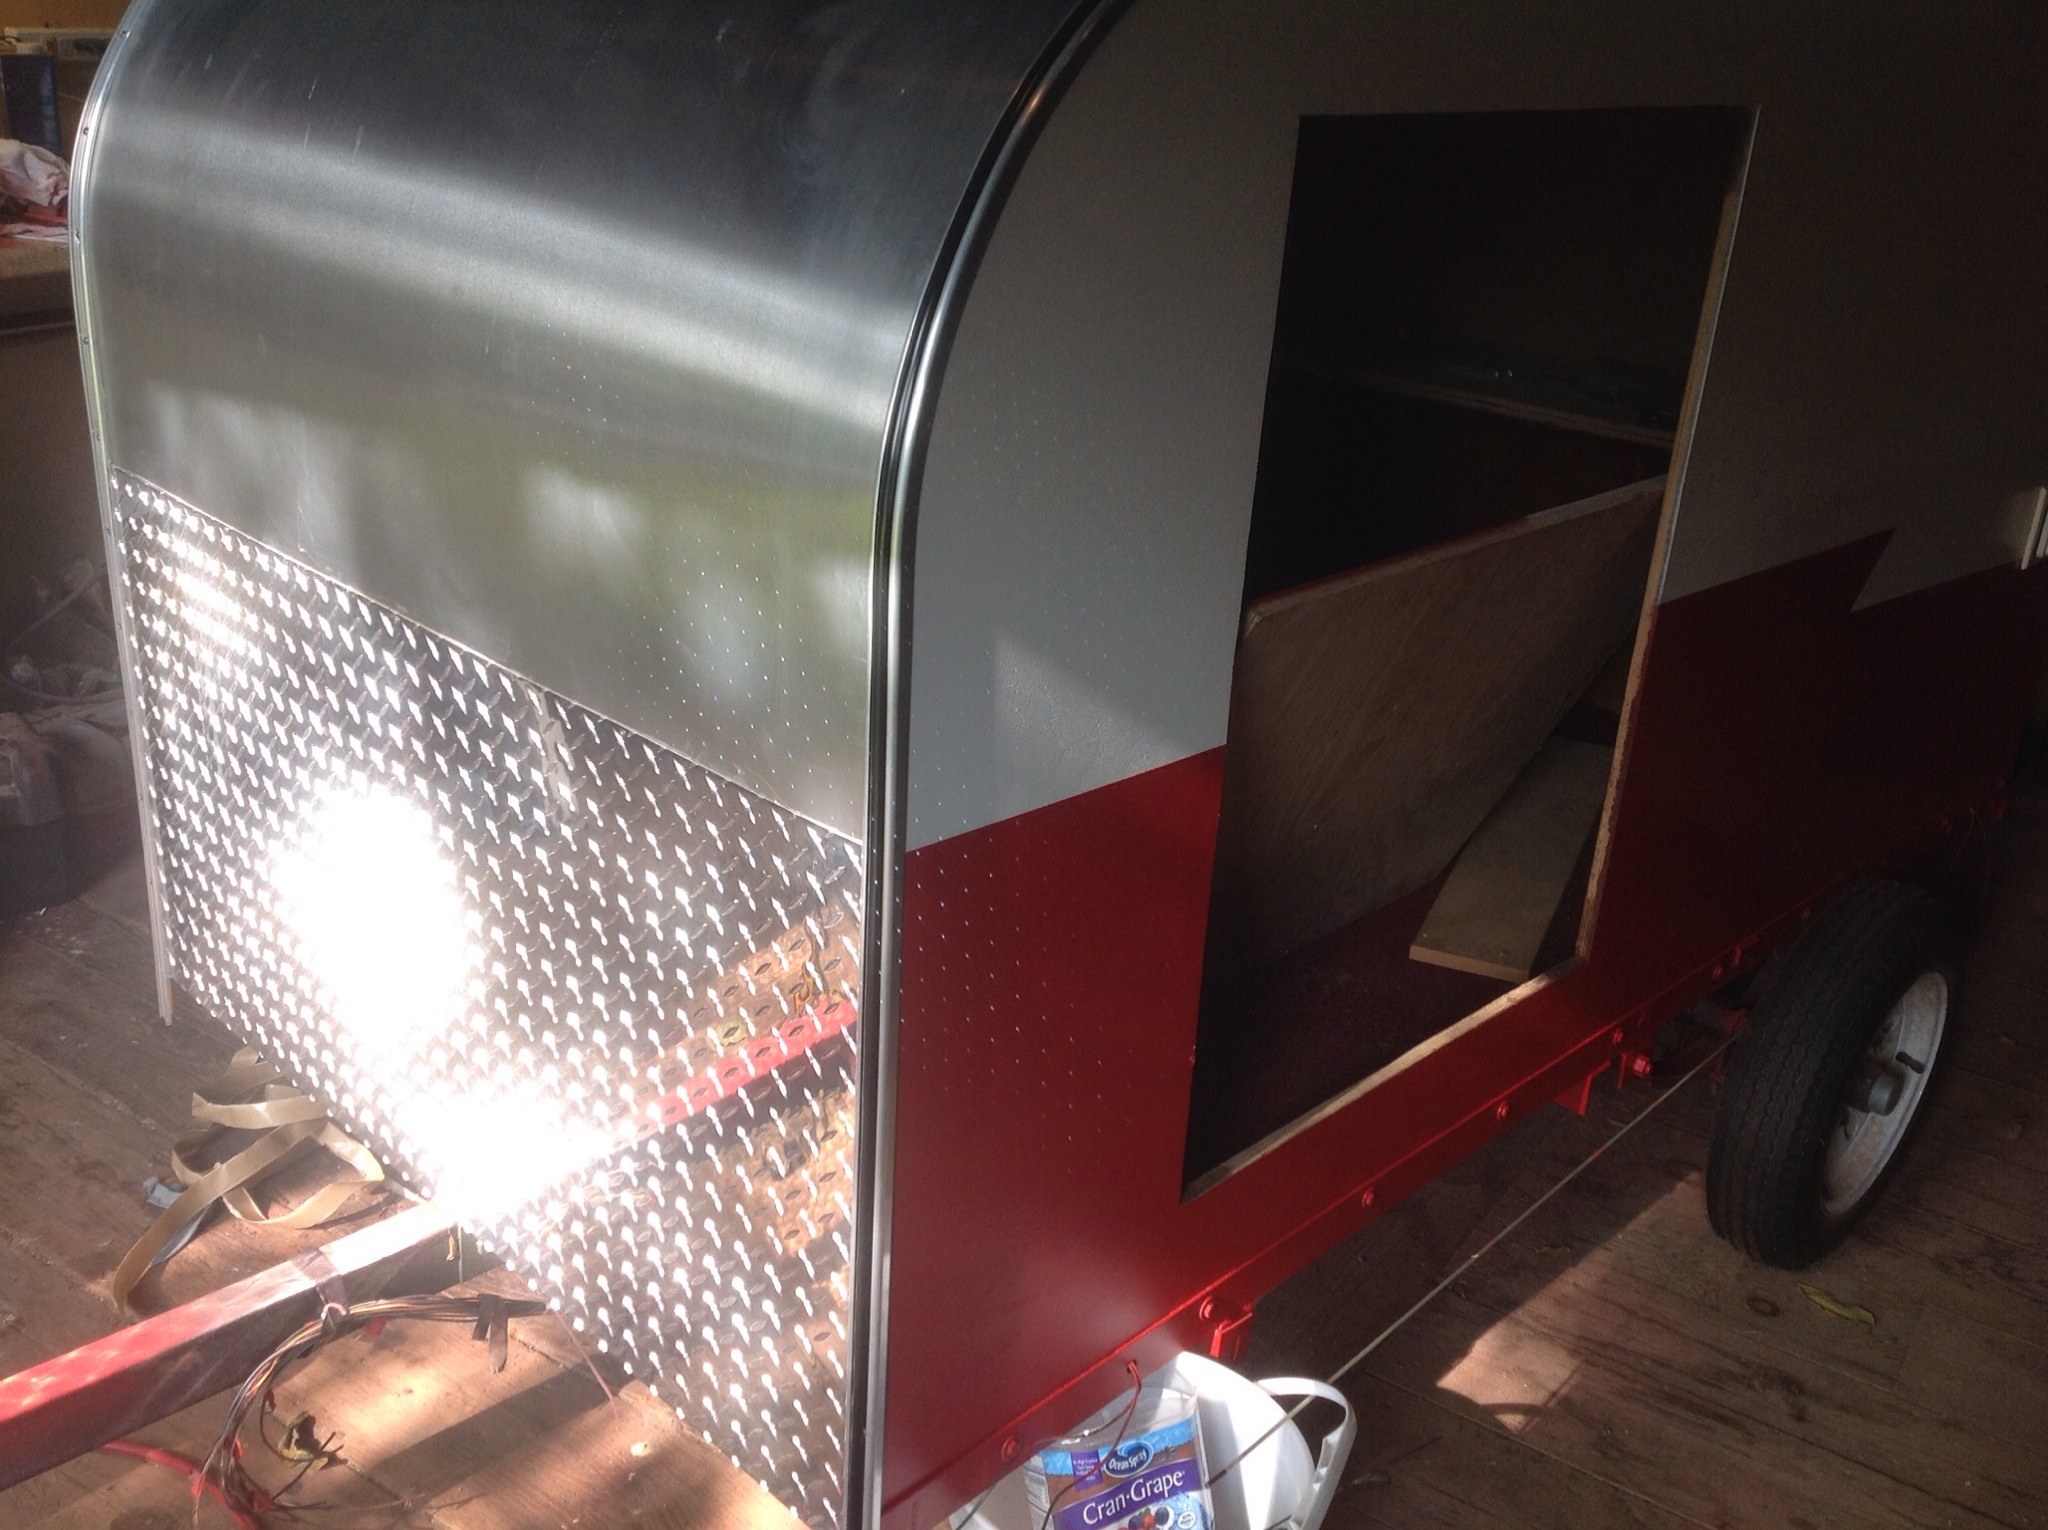


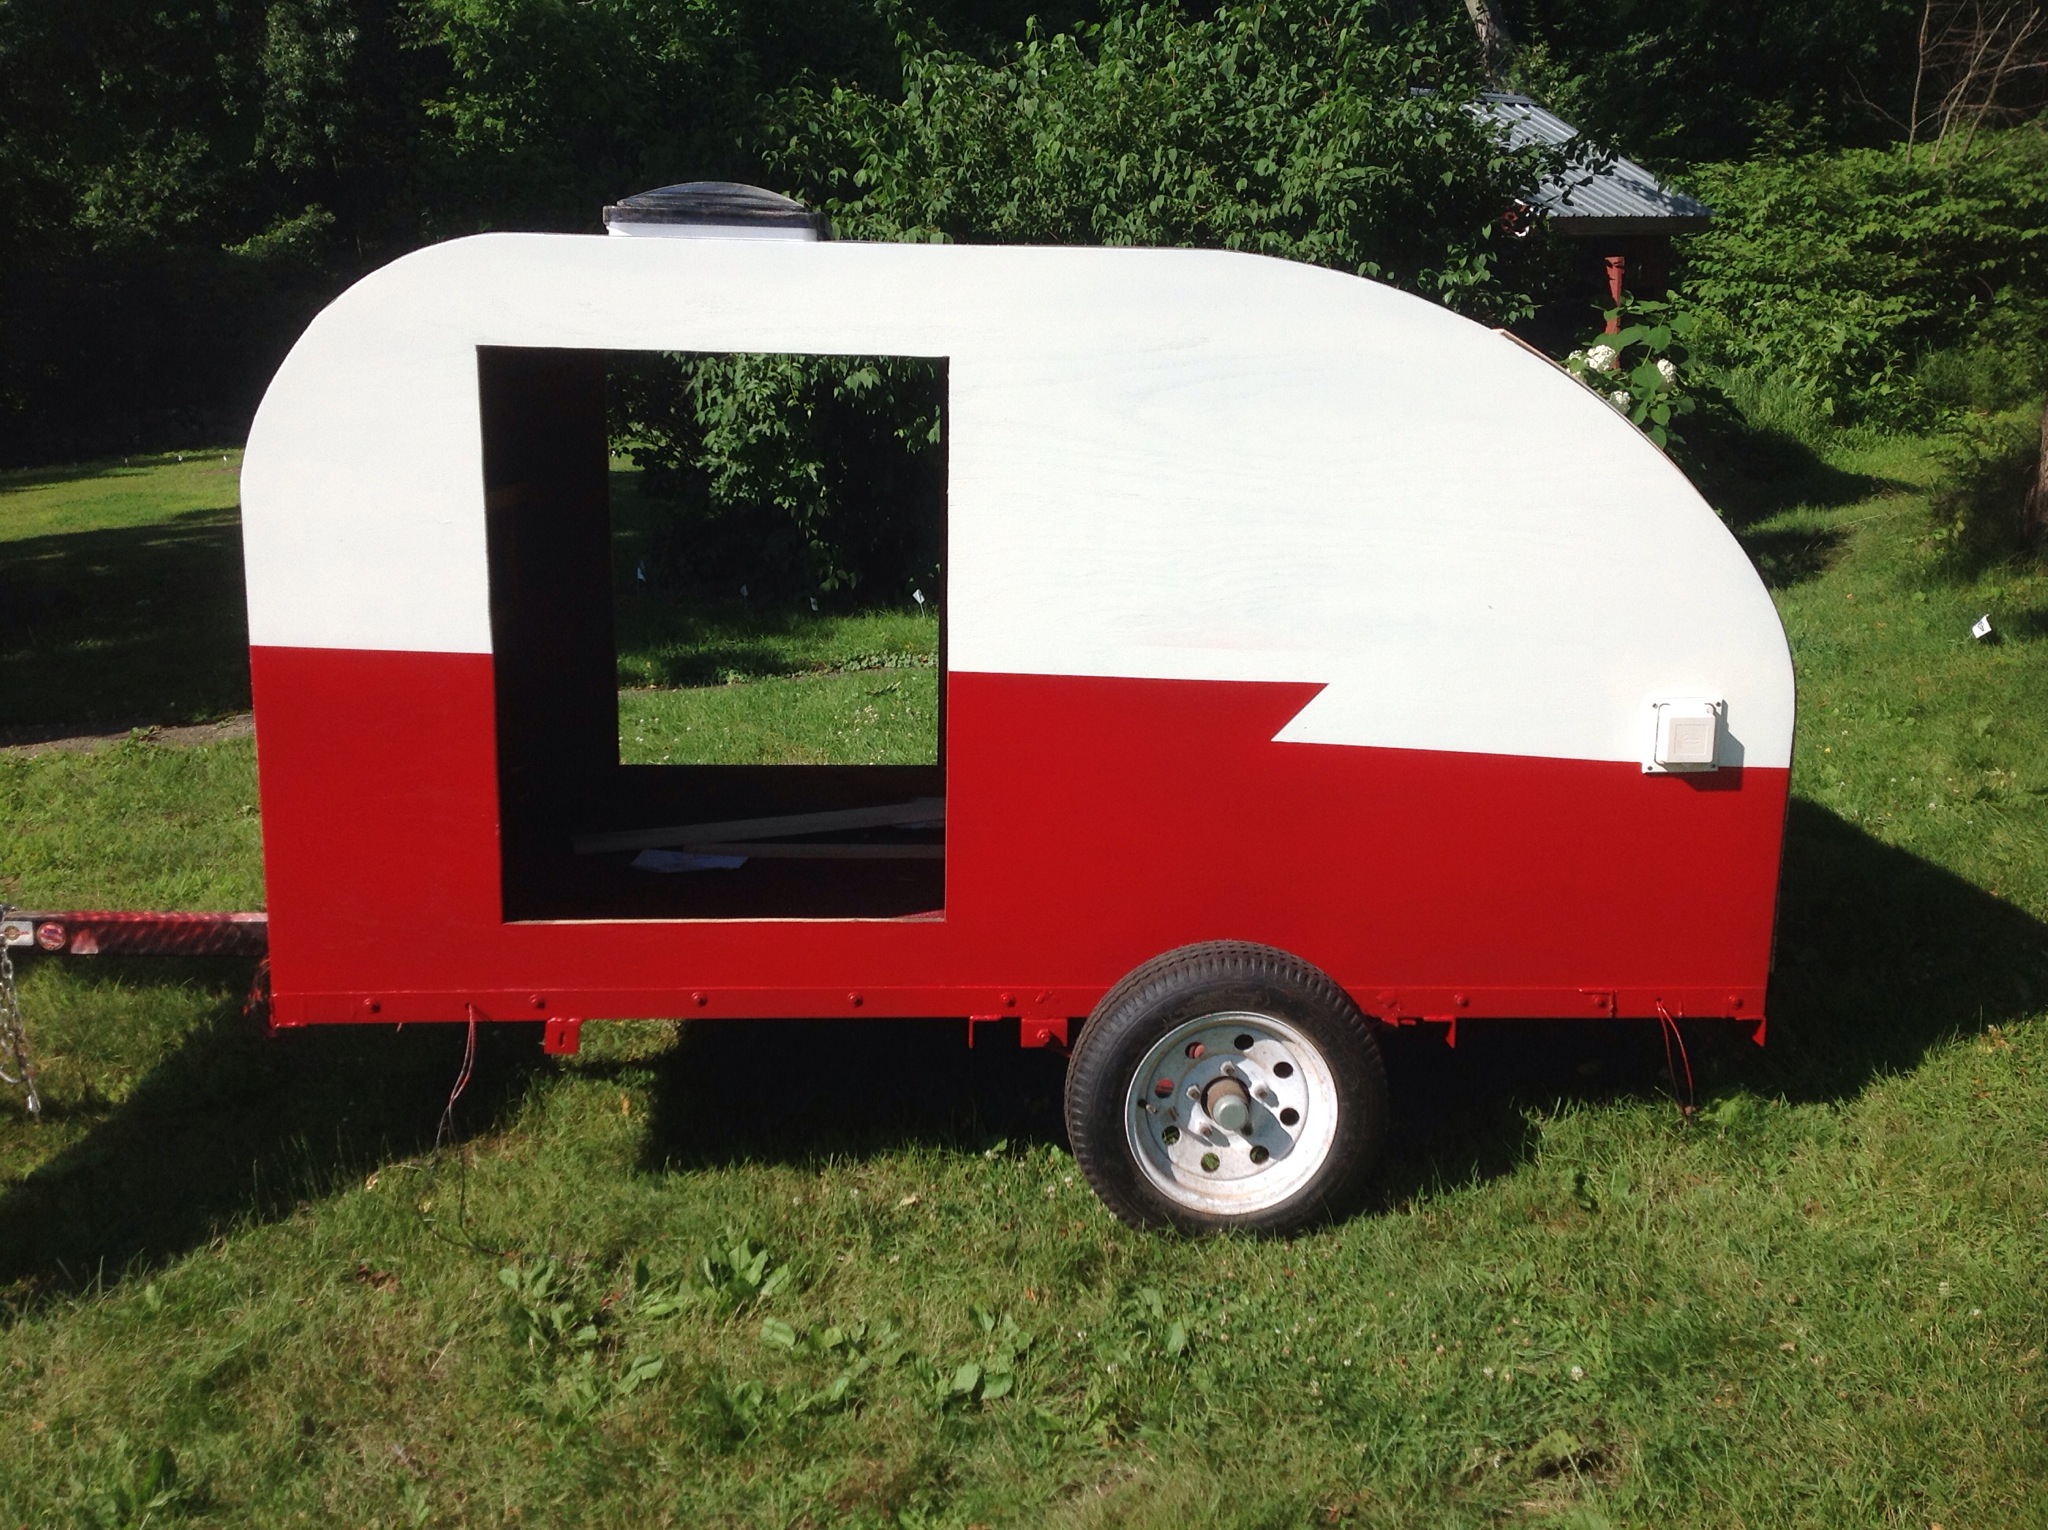
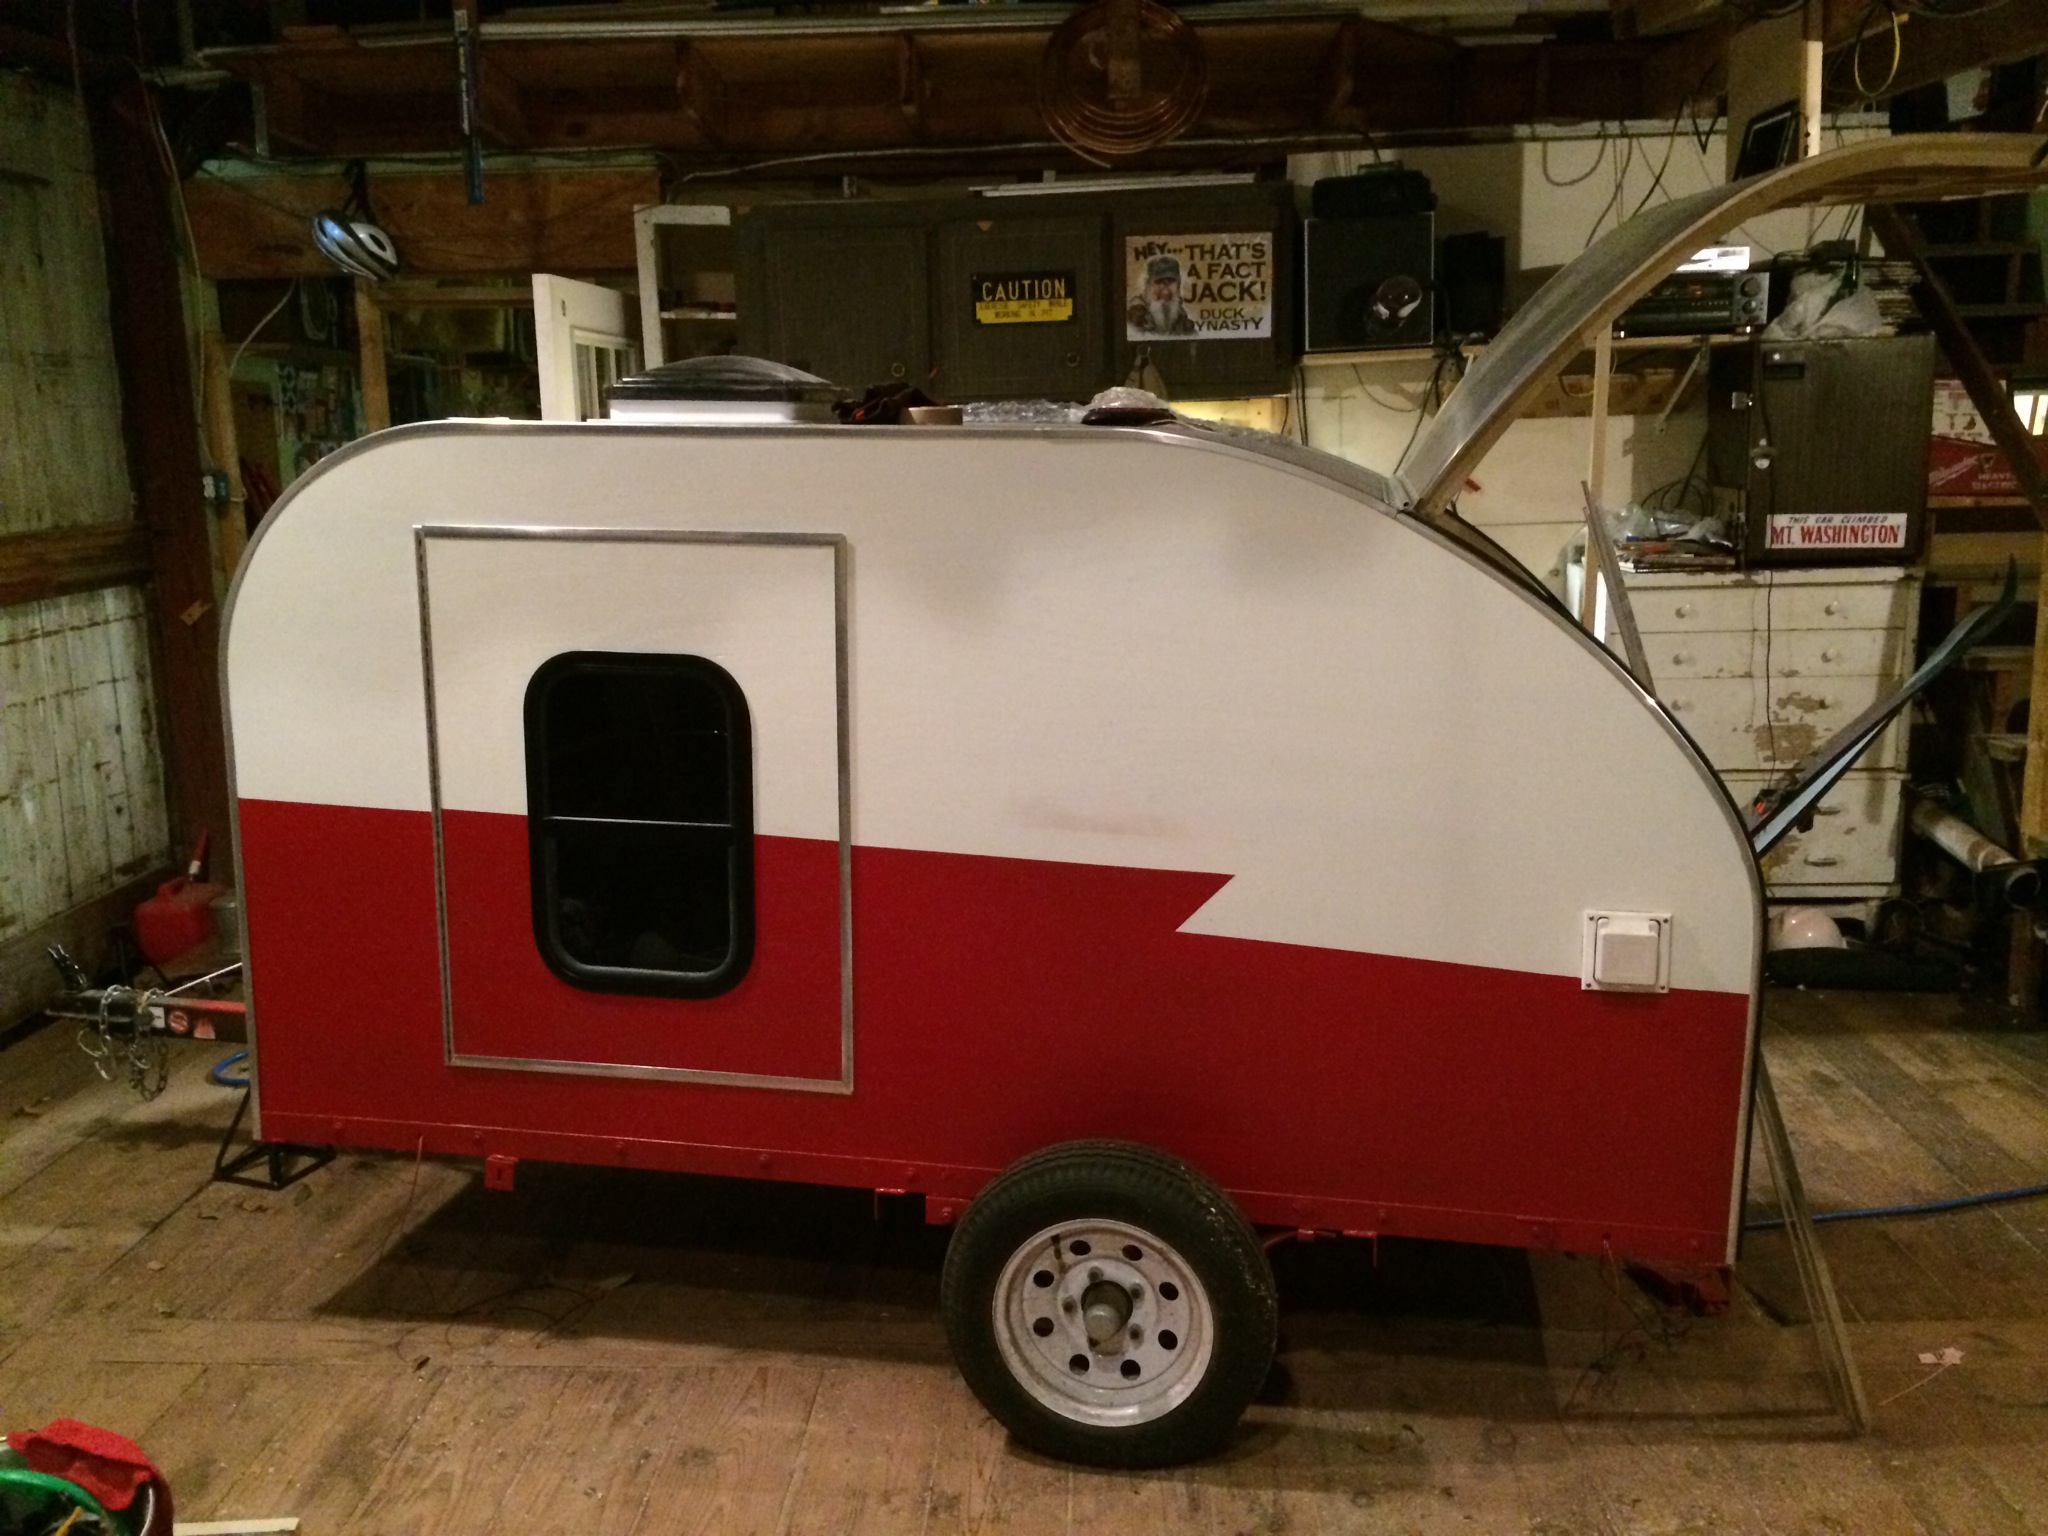
The Mini Shasta look is coming alive .
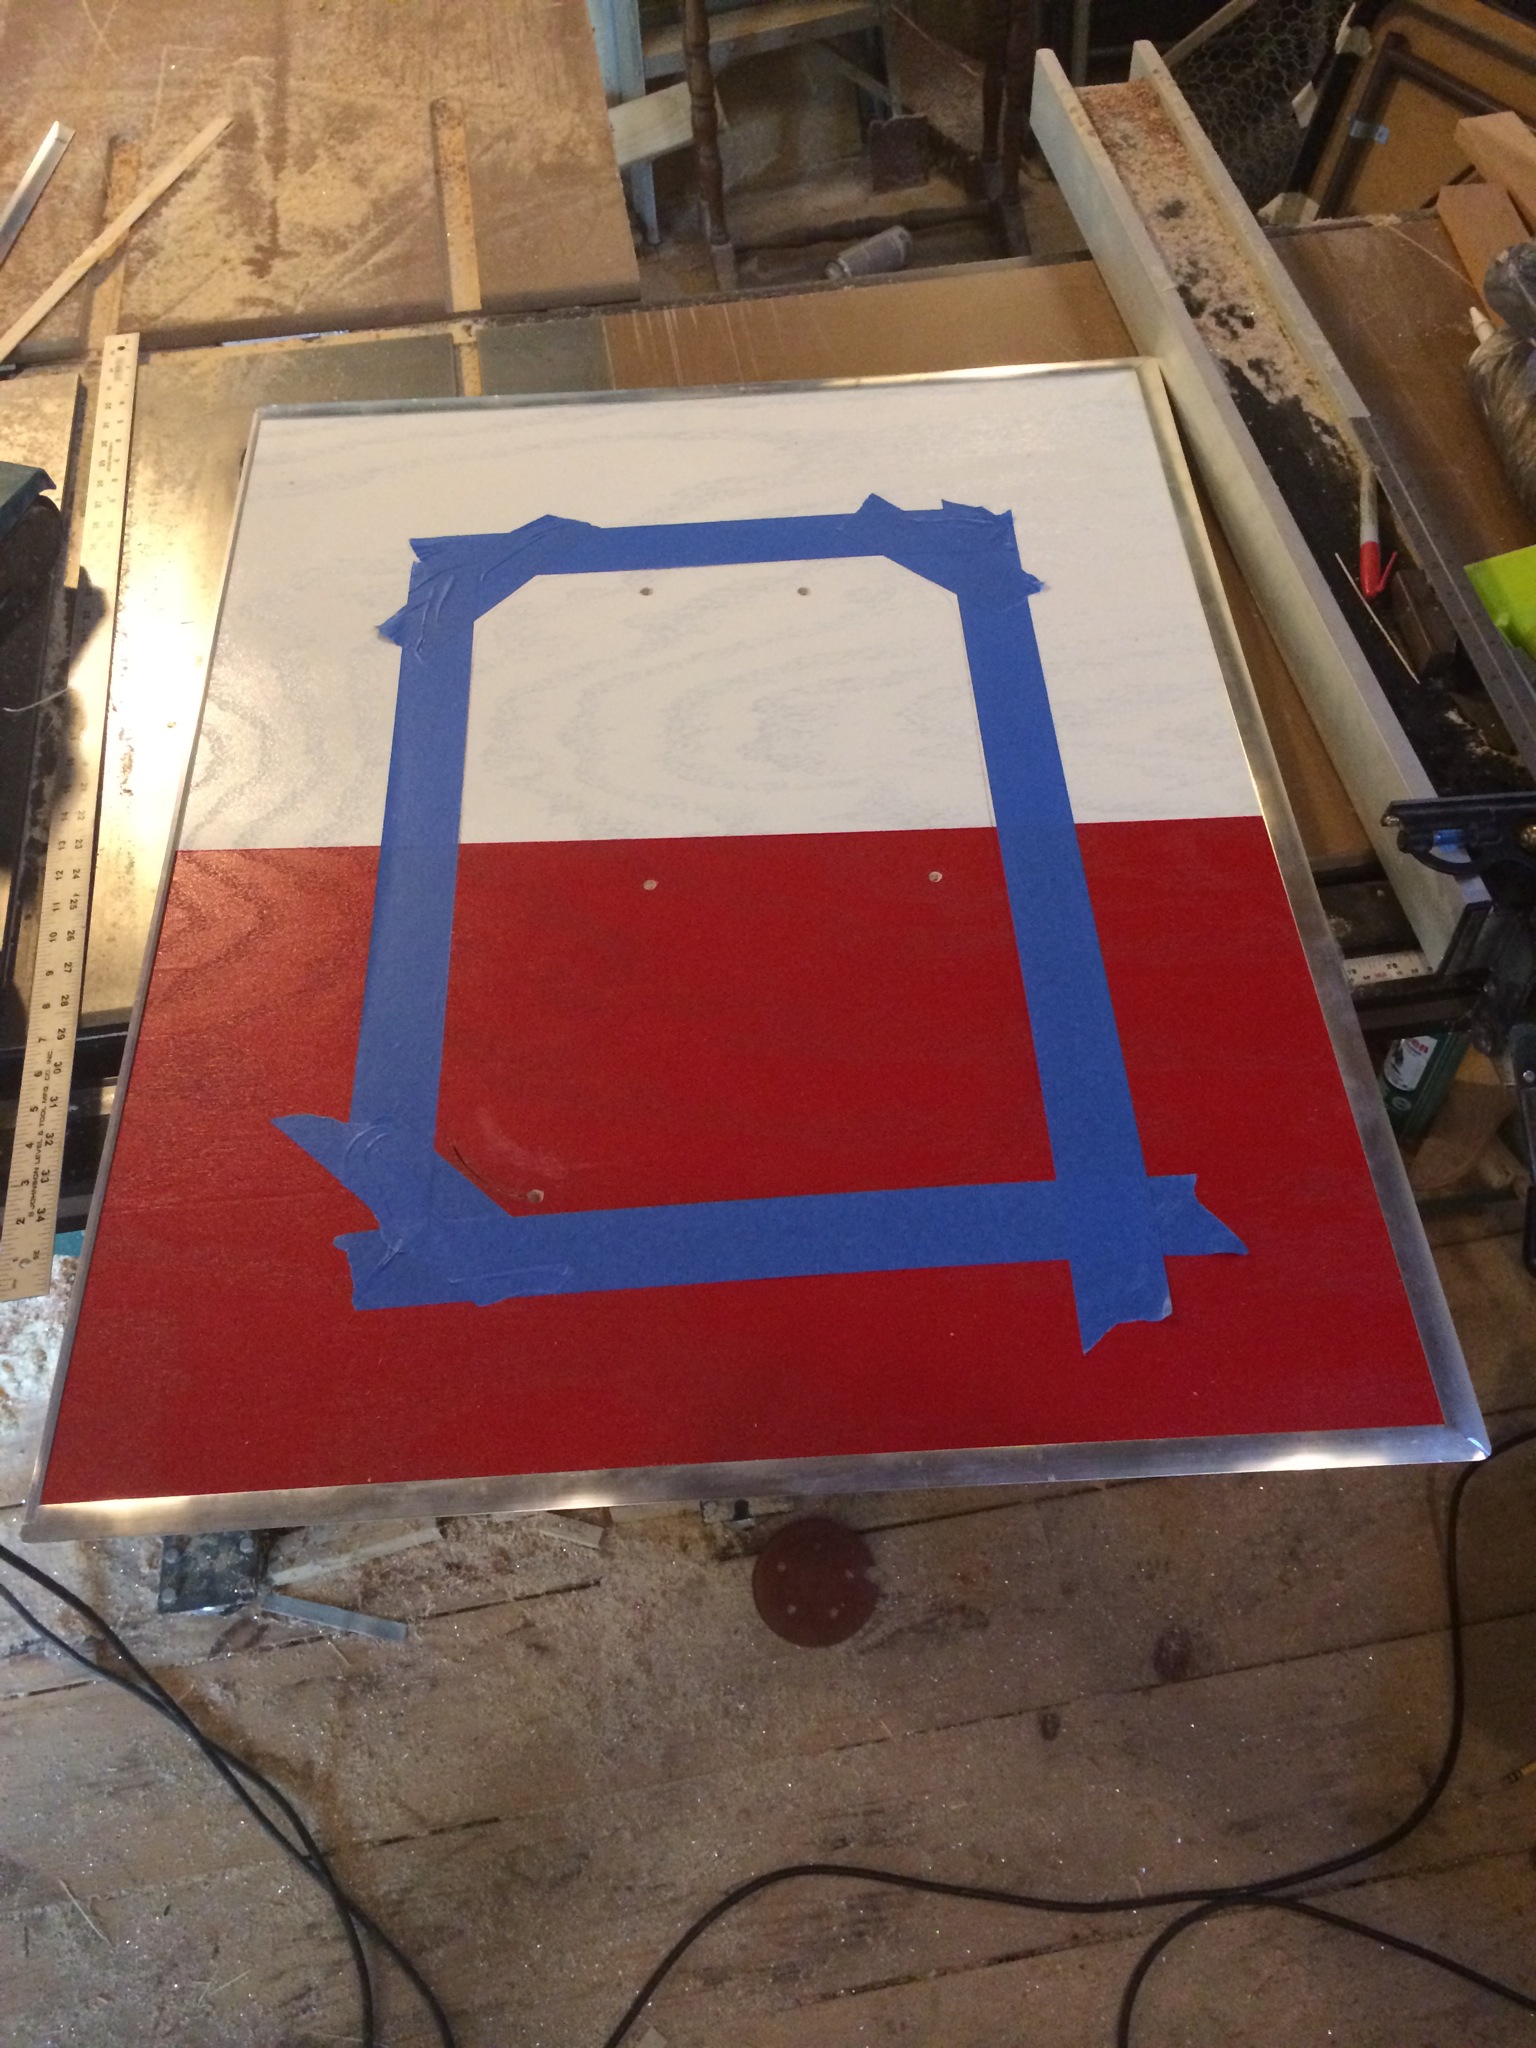
We have 3 coats of sand able primer from Tractor supply. Then 3 coats of IH white and Massey Ferguson red both from Tractor supply
This is the first coat of the Massey Furguson Red from Tractor Supply.
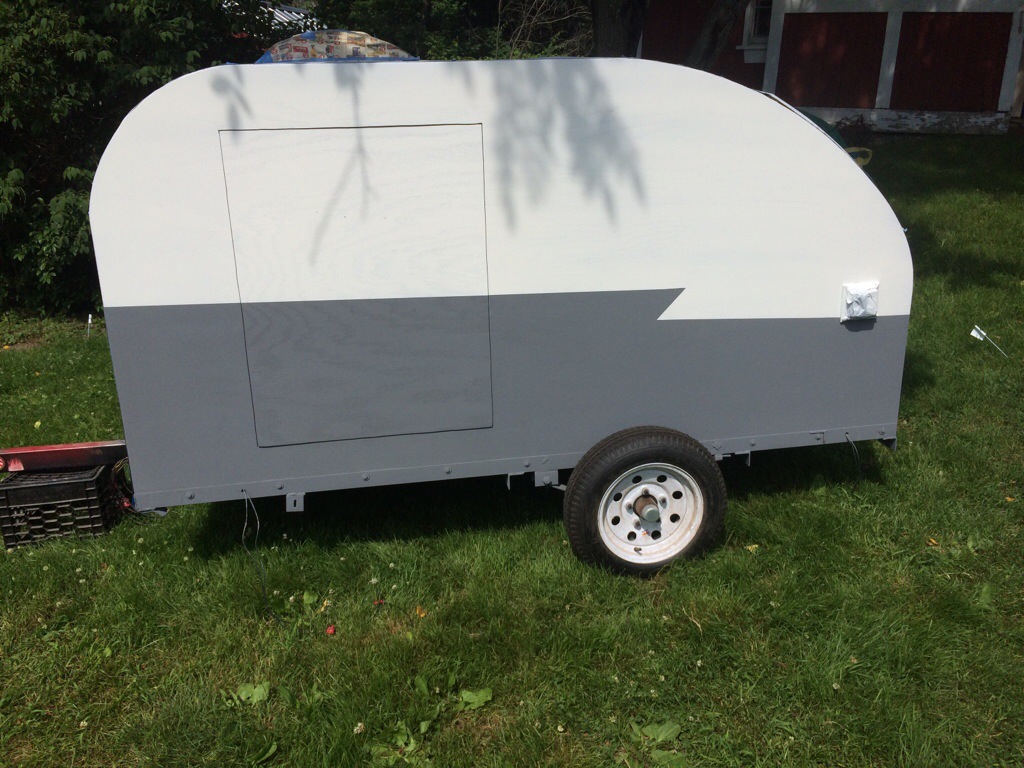
Things are finally starting to take shape(or color)

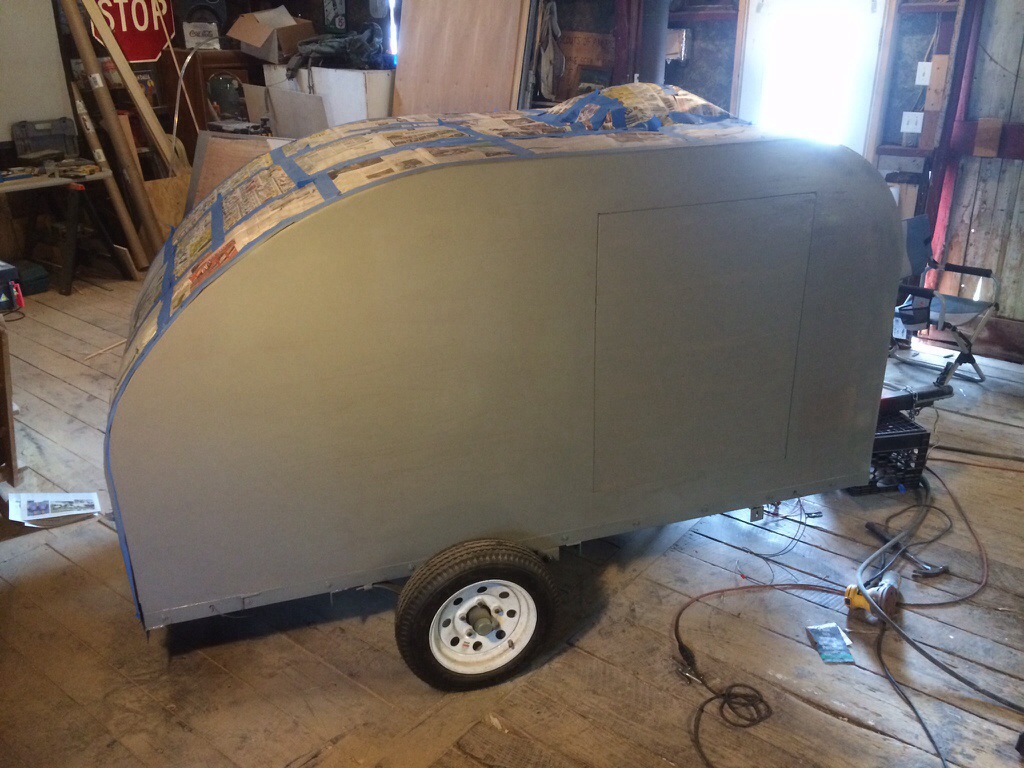
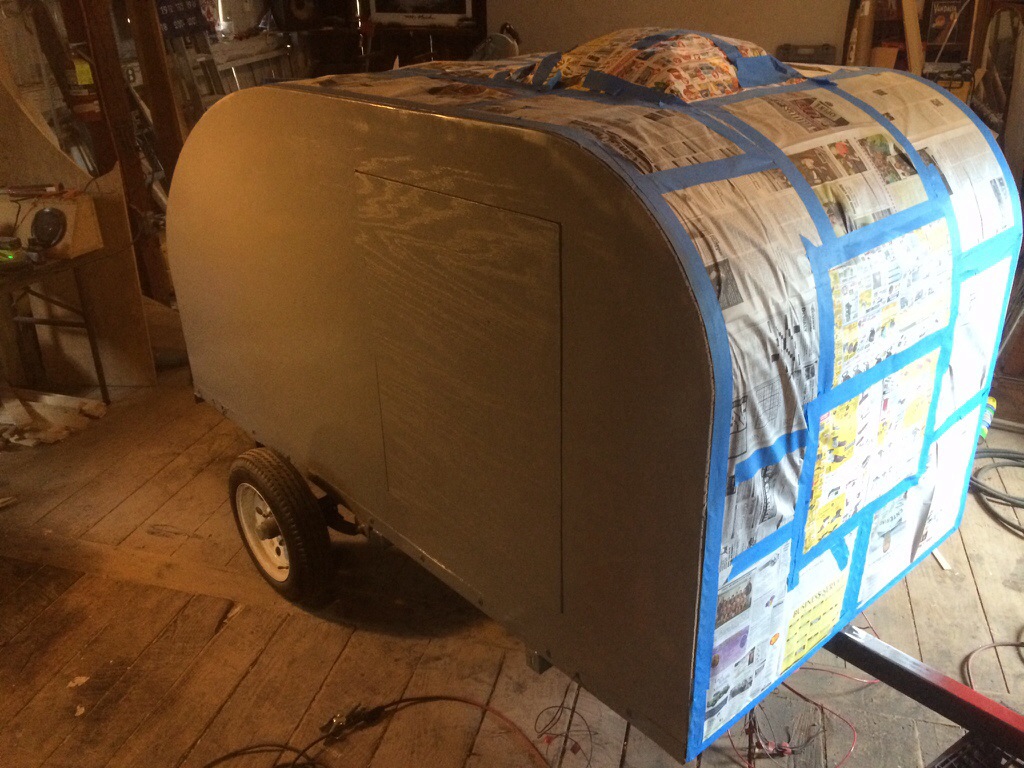
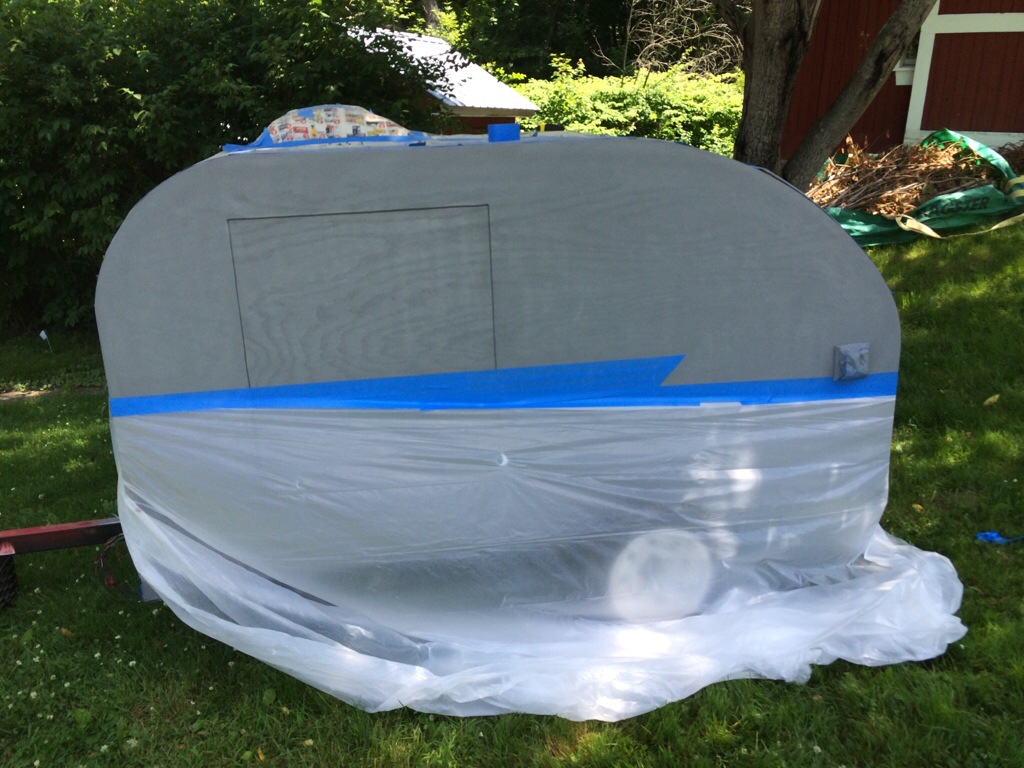
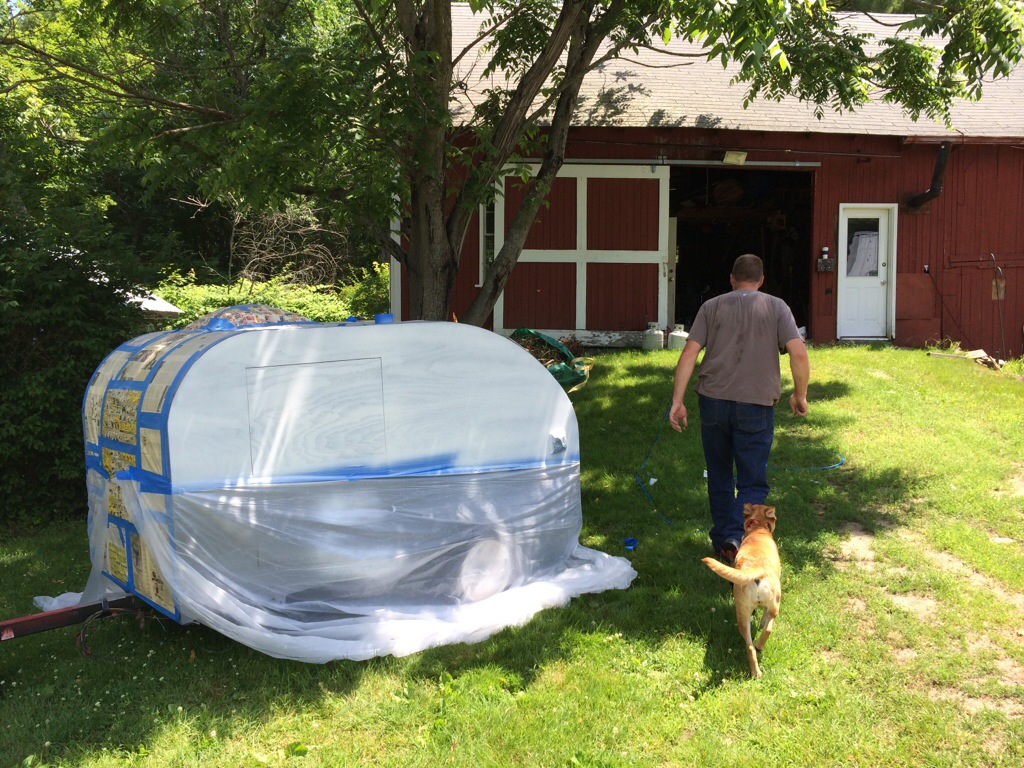
So today I sanded and sanded , masked off all the aluminum and started to first coat the primer.
This is a sand able primer so it will get sanded and primed a few mor times to try to smooth out the grain of the plywood.
Here shows the primer still wet but the smooth areas of the body filler are prominent. Hopefully that will blend in well once a few coats are sanded in between